
Classified Listing → Settings → Email
This section controls every automated email your site sends — from setting up who the emails appear to come from, to choosing which events trigger a notification, to customizing the actual wording of each email template. It’s split into three parts:
1. Sender Options
2. Email Notifications
3. Email Templates
1. Sender Options #
This is where you define the general look and feel of every email your site sends — think of it as your email’s “letterhead.”
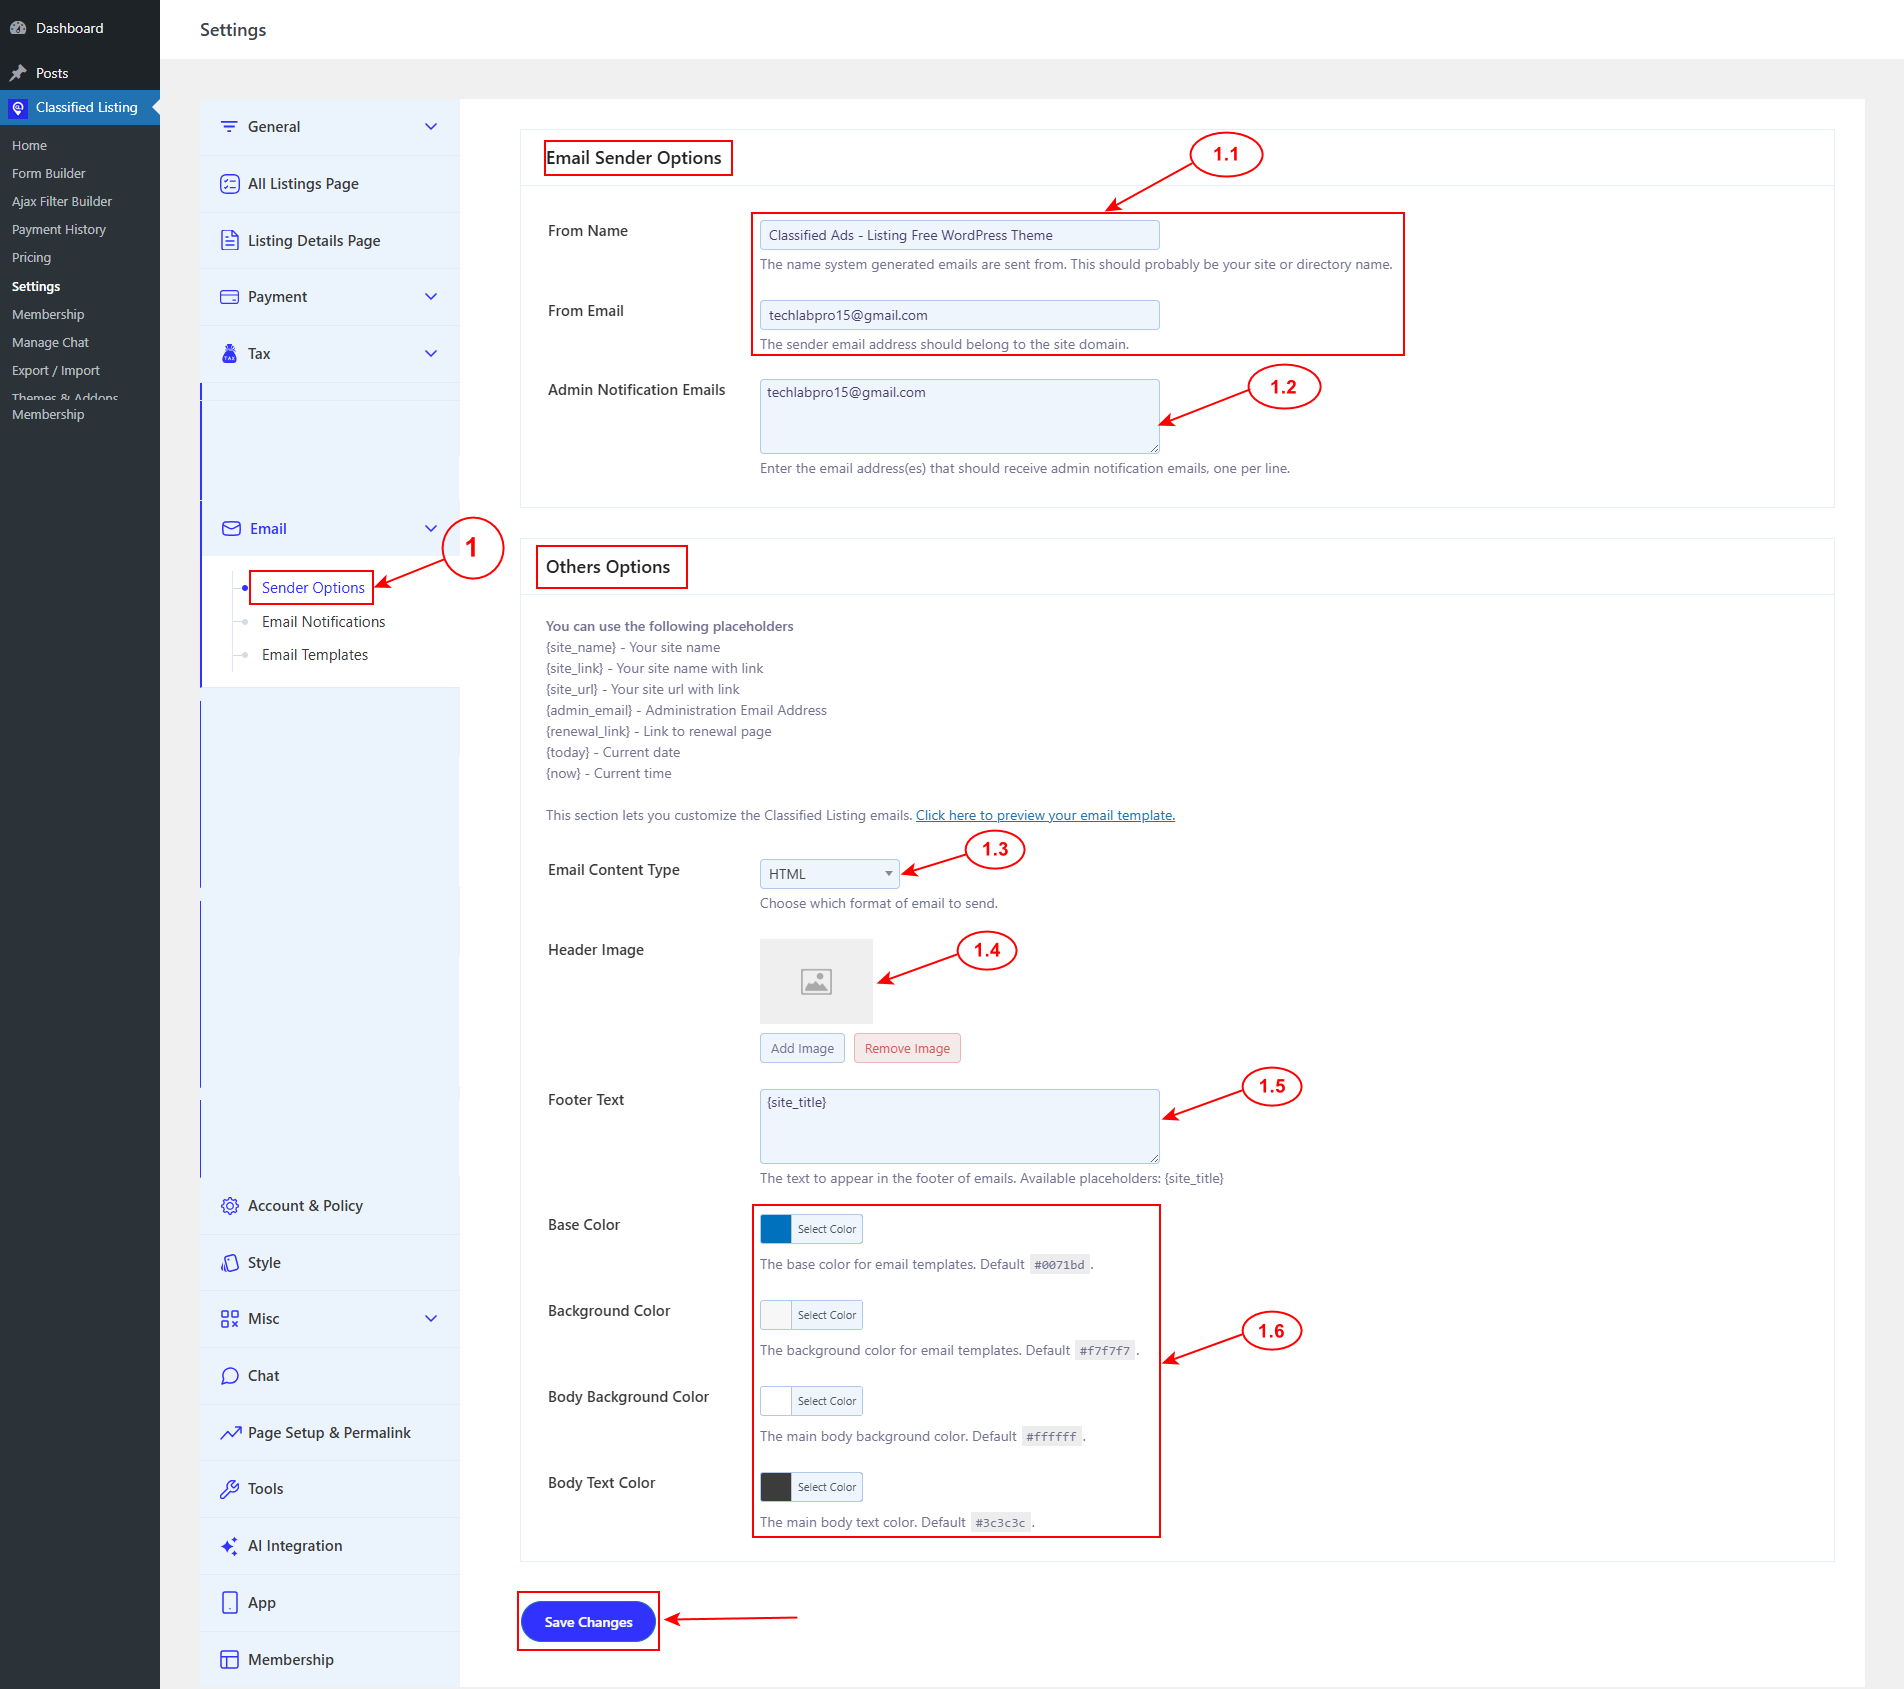
1.1) From Name & Email
The name and address that will appear as the sender when your site’s emails land in someone’s inbox.
Tip: Use your site or directory’s name here rather than a personal name — it looks more professional and helps recipients instantly recognize where the email is from.
1.2) Admin Notification Emails
The email address(es) that should receive admin-side notifications (e.g., when a new listing is submitted). You can add multiple addresses — just enter one per line.
1.3) Email Content Type
Choose the format your emails are sent in: HTML (styled, with images/colors), Plain Text (simple text only), or Multipart (sends both versions together, letting the recipient’s email client pick the best one).
1.4) Header Image
Upload a logo or banner image to appear at the top of your outgoing emails.
1.5) Footer Text
Custom text shown in the footer of every email. You can use the {site_title} placeholder to automatically insert your site’s name.
1.6) Color Settings
Customize the base color, background color, body background color, and body text color to match your site’s branding.
Note: Don’t forget to click Save Changes after configuring this section — none of these settings apply until saved.
2. Email Notifications #
This section lets you fine-tune exactly which events trigger an email — both for you (the admin) and for your users. Think of it as your notification control center.
2.1) Notify Admin via Email when:
Choose which of the following events should alert you by email:
- A new user registers
- A new listing is submitted
- A listing is edited
- A listing expires
- An order is created (for a promotion or membership purchase)
- A payment is received / an order is completed
- A visitor sends a contact message to a listing owner
- A store is updated
2.2) Notify Users via Email when Their:
Choose which events trigger an email to your users:
- Registration is complete (only applies when the user registers through the Classified Listing plugin’s own registration form)
- Listing is submitted
- Listing is approved/published
- Listing is nearing expiration (reaches the renewal reminder threshold)
- Listing has expired
- Listing has expired and reached the renewal reminder threshold
- Order is created
- Order is completed
- Their account is created via import
- (Optional) Disable the “contact” email sent to listing owners
Lastly, click on the save changes button.

Note: Enabling every notification can be useful early on, but on a high-traffic site it may lead to inbox overload for both admins and users. Consider starting with the essentials (new listing, payment received, listing expiring) and adding more as needed.
3. Email Templates #
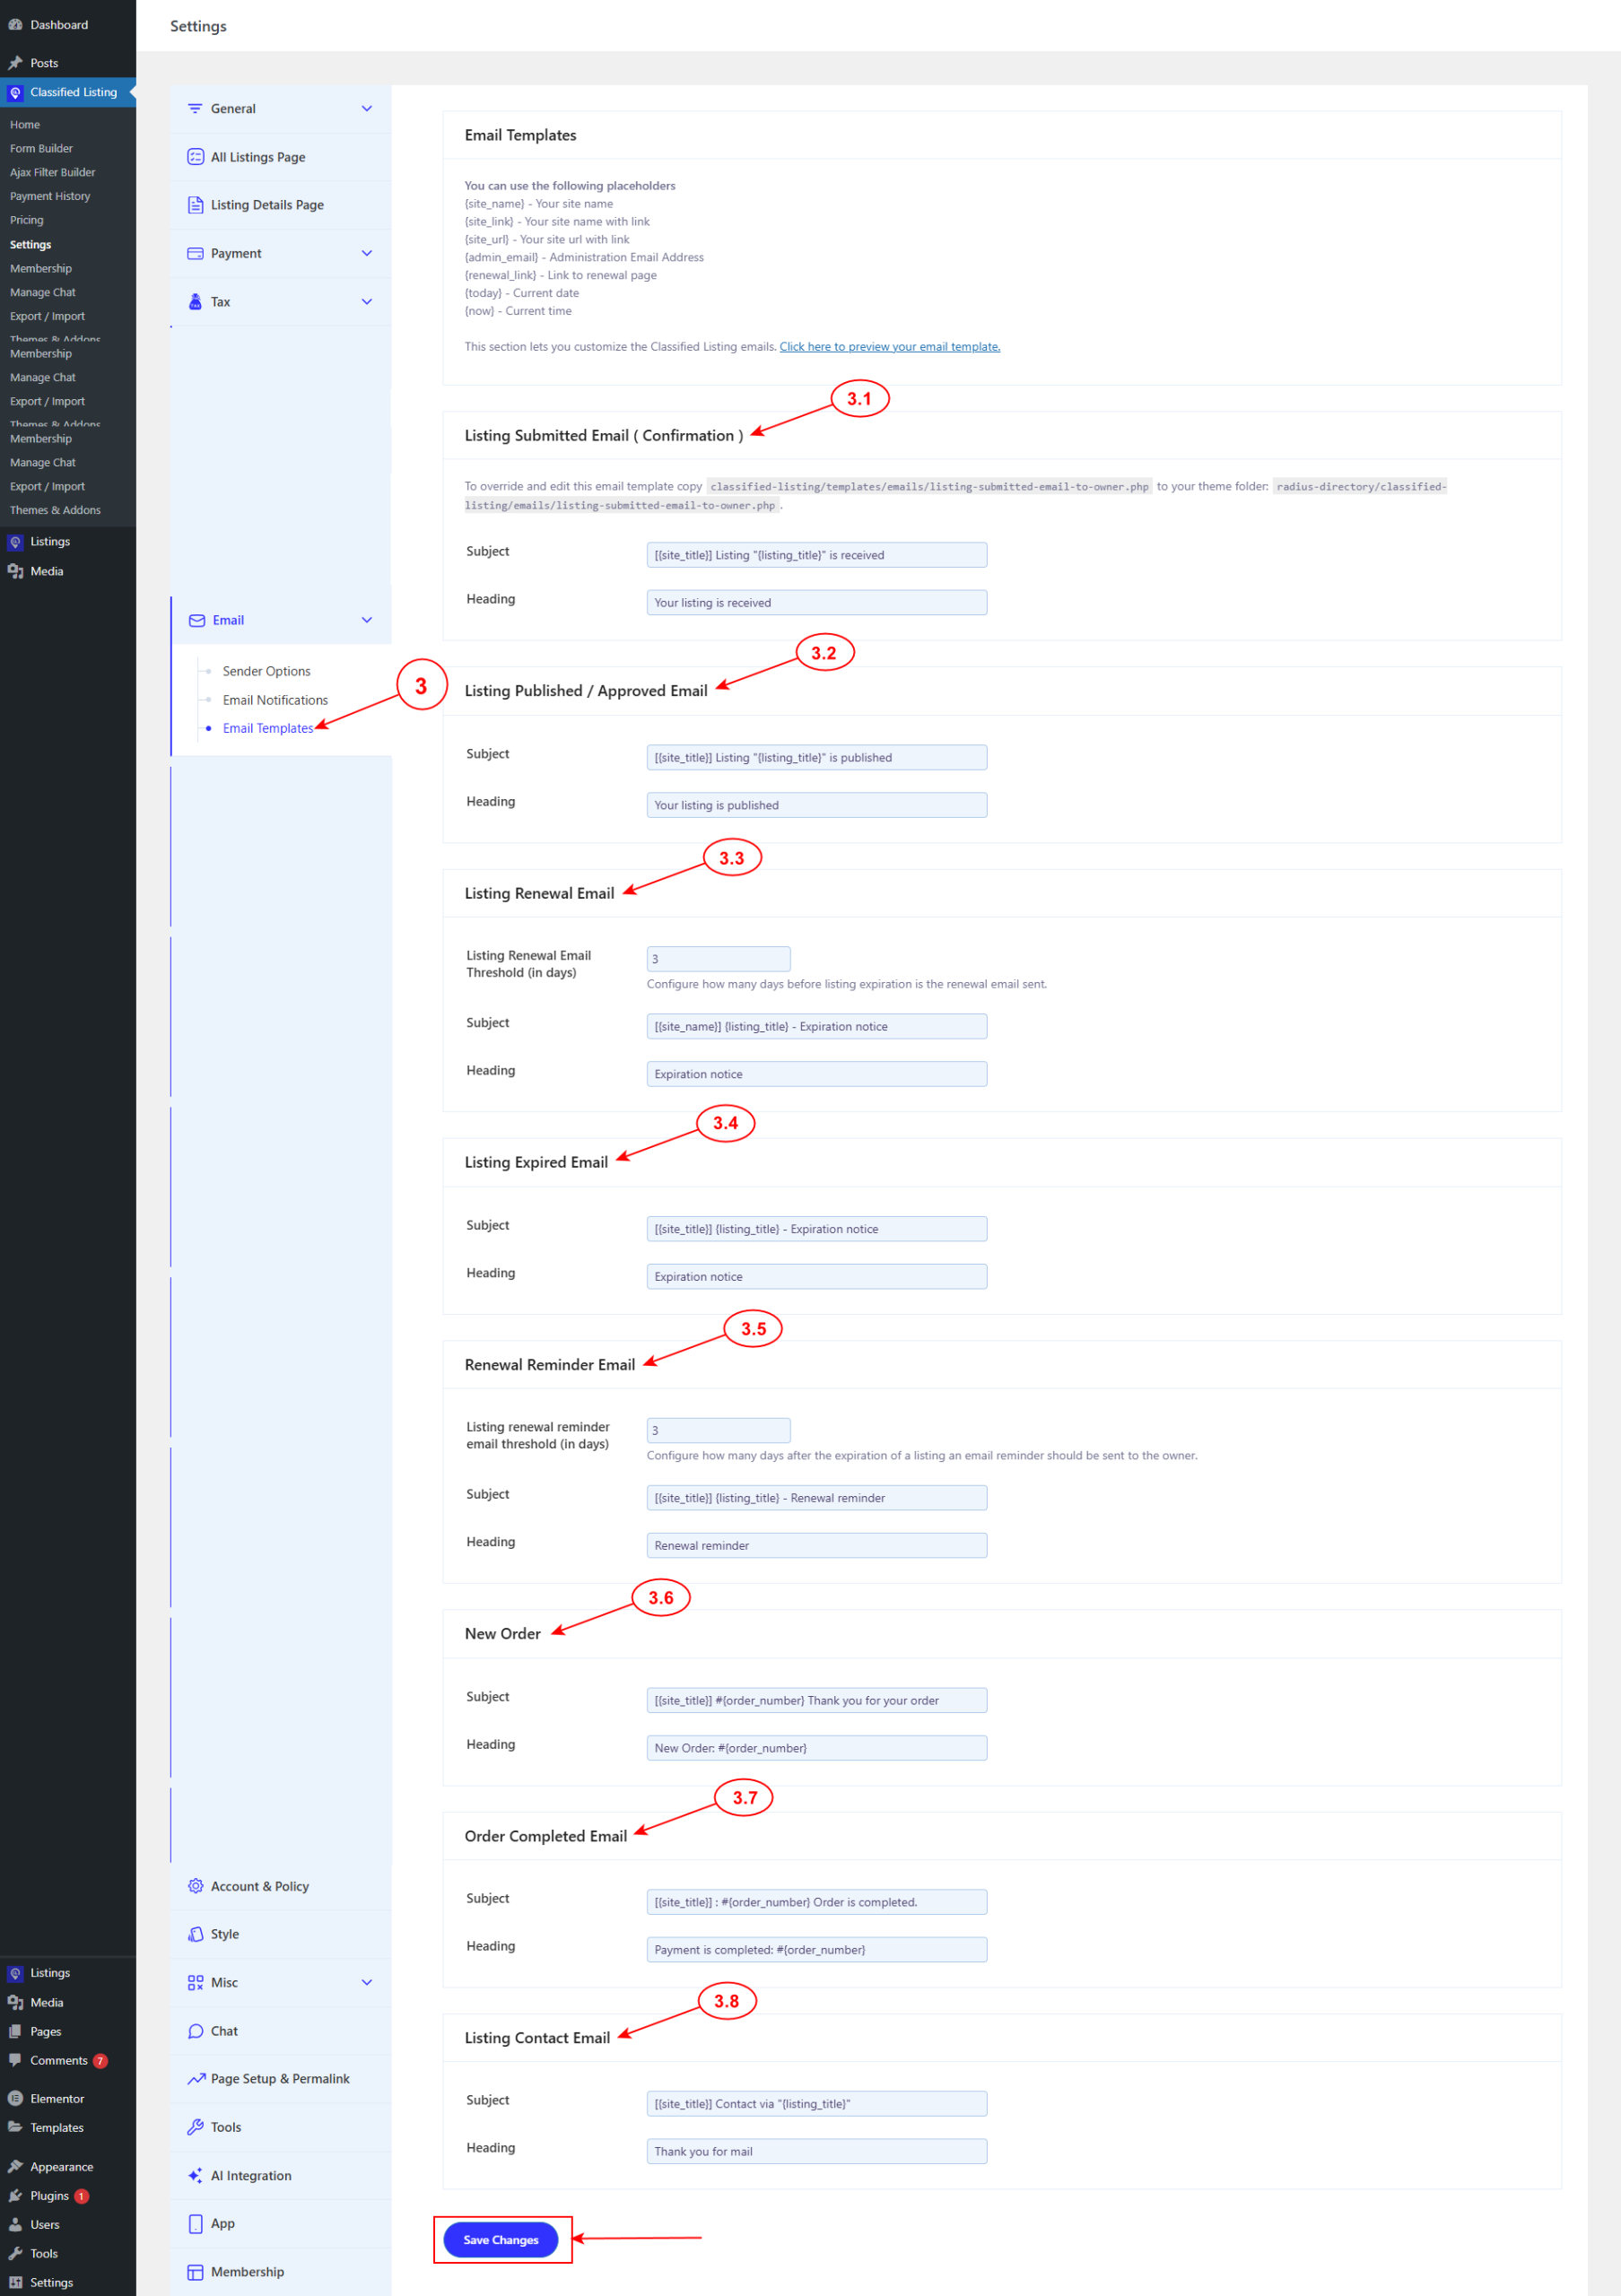
Here, you can personalize the actual subject line and heading text for each type of automated email. This lets your notifications sound like your brand rather than generic system messages.
| Template | What you can customize |
| Listing Submitted (Confirmation) | Subject & heading |
| Listing Published / Approved | Subject & heading |
| Listing Renewal | Days before expiration to send + subject & heading |
| Listing Expired | Subject & heading |
| Renewal Reminder | Days after expiration to send + subject & heading |
| New Order | Subject & heading |
| Order Completed | Subject & heading |
| Listing Contact | Subject & heading |
Lastly, click on the save changes button.
Tip: For the Renewal and Renewal Reminder emails, the timing settings matter just as much as the wording — set them early enough to give sellers a real chance to renew before (or shortly after) their listing lapses.


