

On This Page
Do you want others to collaborate on your WordPress blog by submitting posts? But you don’t want to take the risk of offering guest collaborators access to your WordPress website’s back-end.
So, how will they make posts then? Simply, you can allow users to submit posts on the front end. You just need to utilize the best WordPress post submission plugin to offer users this benefit.
That said, this article will discuss how to set up a front-end submission system using the Post Grid WordPress plugin.
Benefits of Front-End Post Submission on Your Blog
You’ll reap numerous benefits by enabling front-end post submission on your blog. For example, you allow users to submit posts directly on your site without needing to access your website’s backend. Here are a few more benefits.
Increased Content Flow: As users can easily submit posts on your blog, you get a steady stream of unique content, filling your website’s content calendar without needing you to write every post.
Enhanced Security: Since contributors don’t need to access the back-end of your website, you reduce the risk of unauthorized access.
Improved Efficiency: You don’t need to write posts and manage reformatting content. Therefore, you can save time and effort and invest that time and effort in expanding your business or working on something more valuable.
Content Moderation: As the administrator, you monitor the content submission process. You can ensure that all submitted blog posts meet your quality standards before it gets published.
How to Enable Front-End Blog Submission with Post Grid Plugin
Before you enable front-end post submission on your blog with the Post Grid plugin, ensure you have the pro version of this best post submission WordPress plugin. If you don’t, get one and follow the steps below.
Step 1: Install and Activate The Post Grid Pro
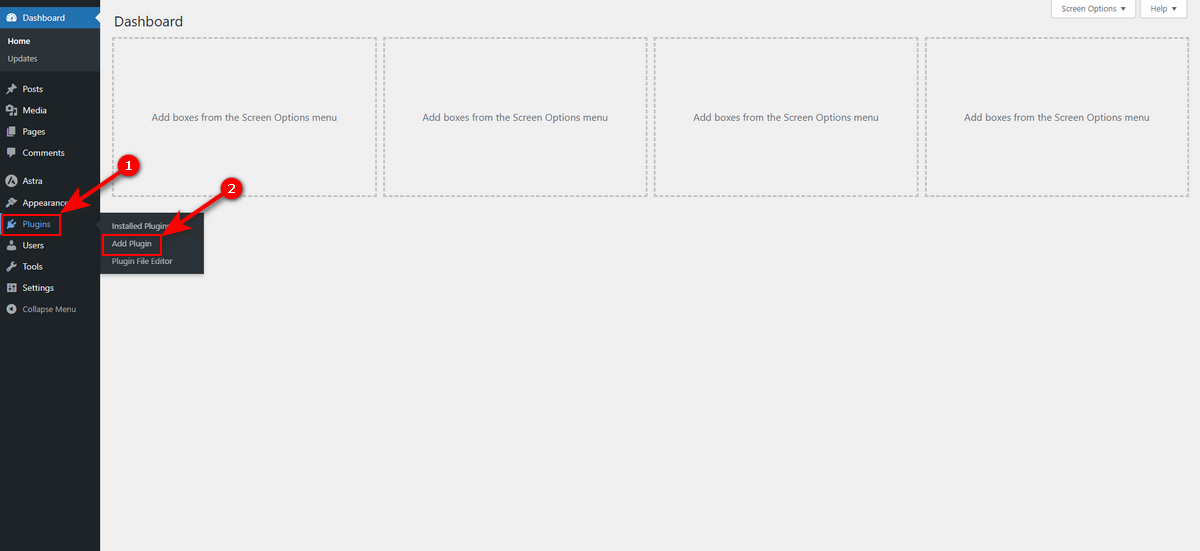
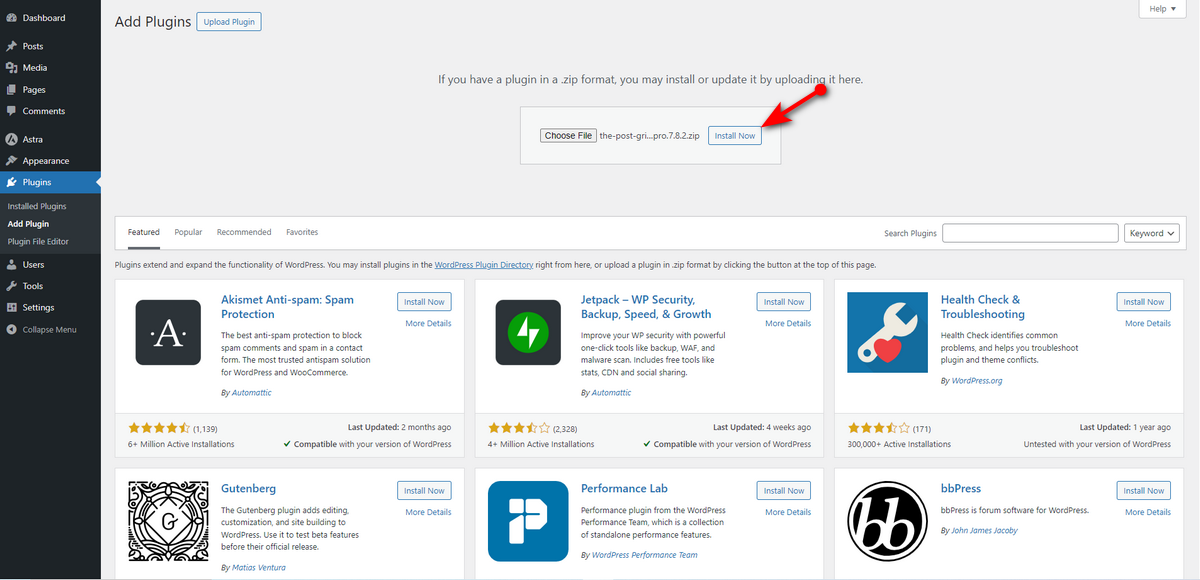
You’ll get a zipped file of this plugin via email after purchasing the pro version. Now, upload this file to your website. To do so, go to Plugins >> Add Plugin from your WordPress Admin Panel.
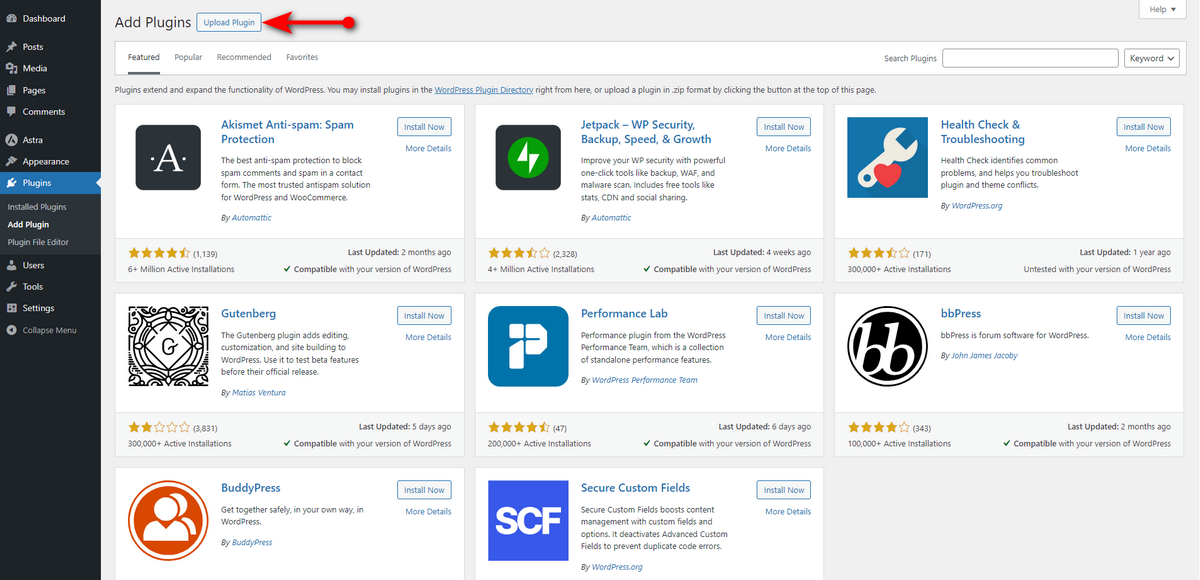
Now, hit Upload Plugin button.
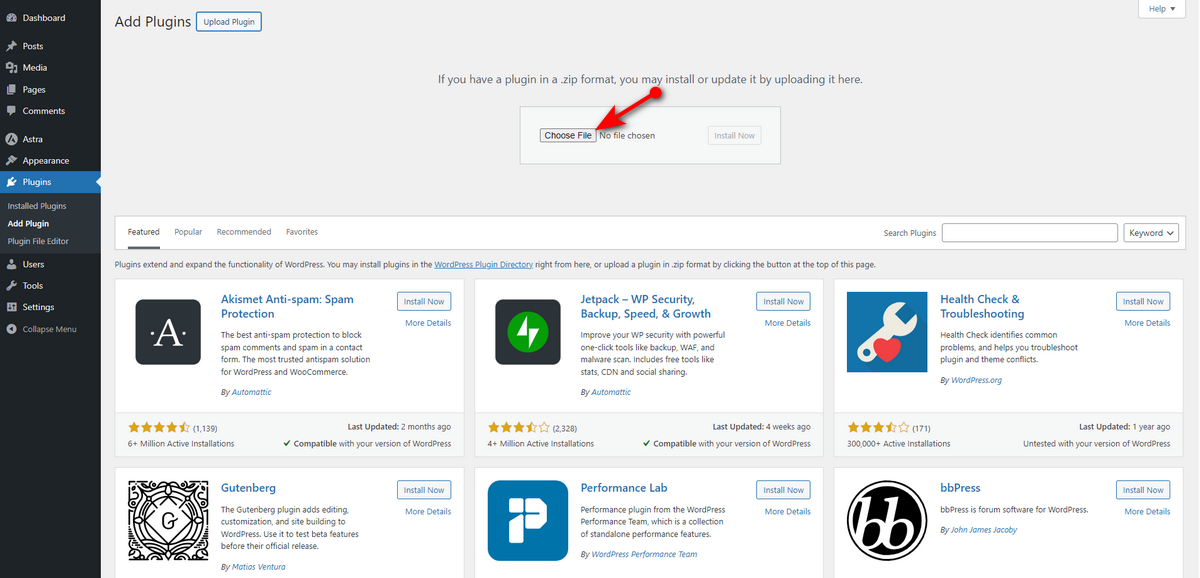
Click Choose File button to upload your plugin’s zipped file.
After that, press Install Now button.
Lastly, click Activate Plugin button.
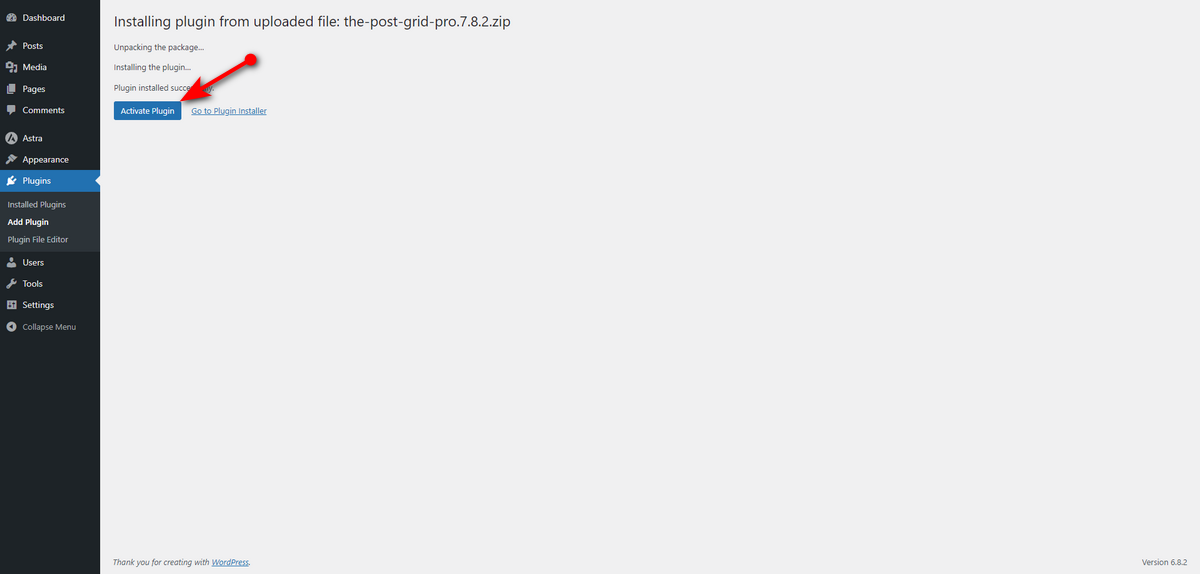
You’ve successfully installed and activated the Post Grid Pro plugin. Hold on! This plugin requires the free version to work. So, install the free version of Post Grid from the WordPress plugin repository before moving to the next step.
Step 2: Enable Front-End Submission
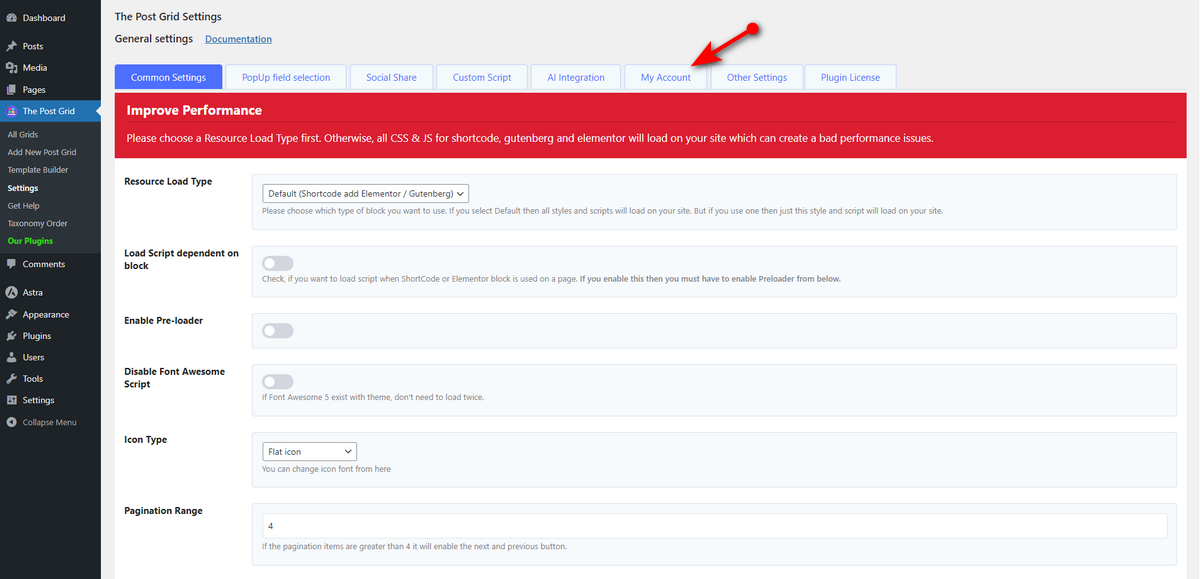
Now is the time to enable front-end post submission. So, head to WP Admin Panel >> The Post Grid >> Settings.
Then, click My Account tab.
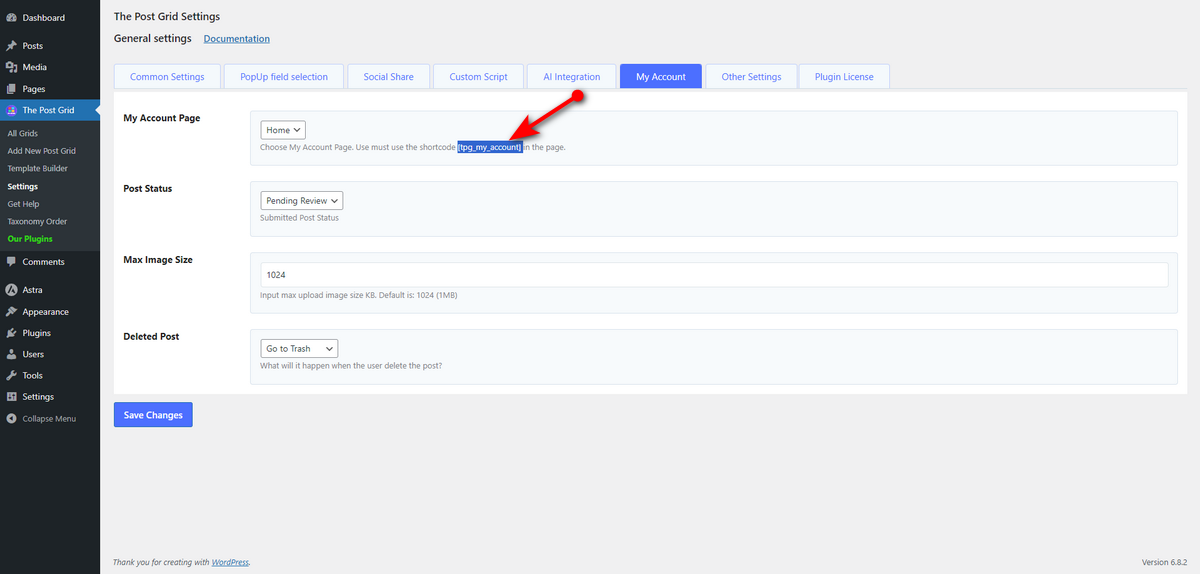
Now, familiarize yourself with the My Account tab of The Post Grid plugin. Here, you can see three drop-down menus to help you select your My Account page, post status, and choose whether to send your posts to the trash or delete them permanently.
Additionally, the My Account tab features a Max Image Size field, which allows you to determine the maximum image size that can be uploaded with every post. You can read the documentation to gain a better understanding of the functions of each option on the My Account tab.
Let’s go back to enabling front-end post submission. First, we need to create a My Account page with a shortcode. So, copy the shortcode underneath the My Account Page drop-down menu.
Then, navigate to your admin panel and go to Pages >> Add Page.
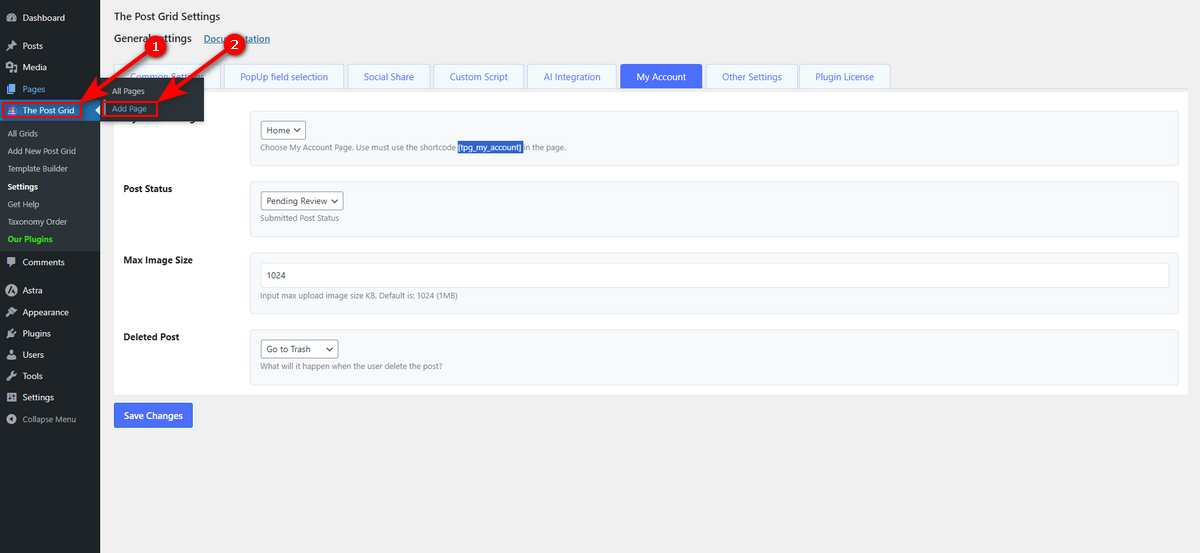
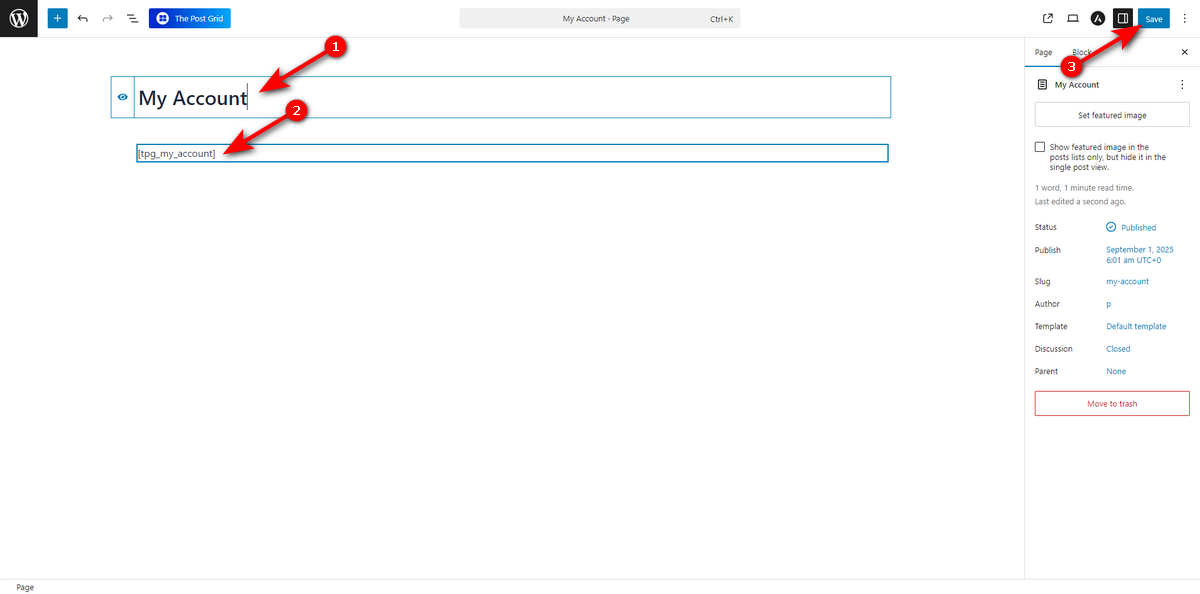
Now, write your page title and paste the shortcode you copied from the My Account tab of the Post Grid plugin into another block of the Gutenberg editor. Lastly, publish the page.
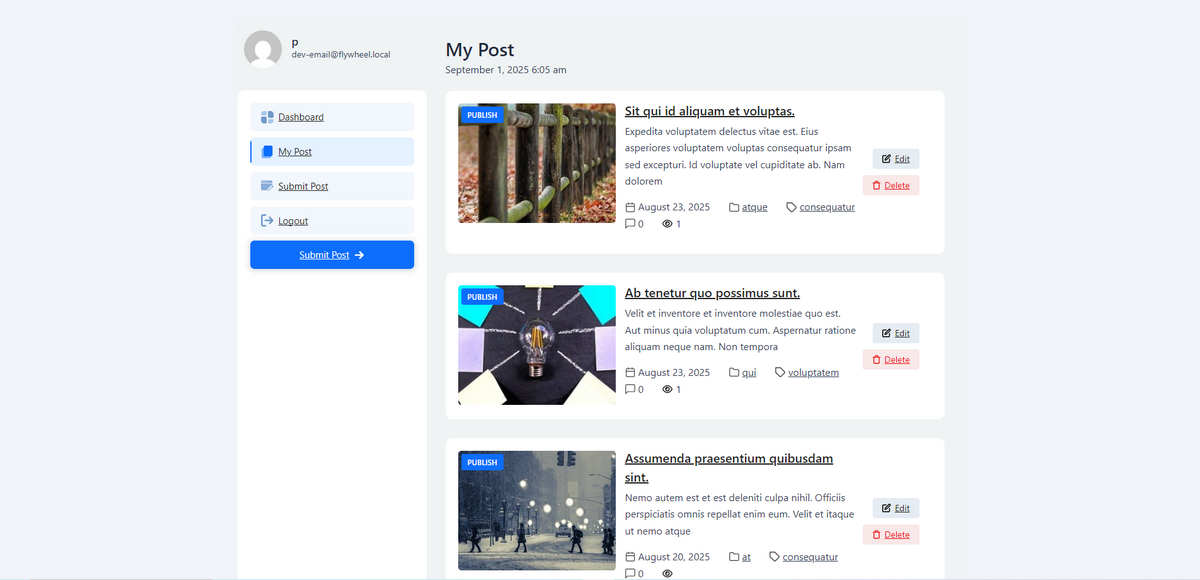
Now, visit the page and you’ll see the My Account dashboard with the front-end post submission feature.
Step 3: Create and Submit a Post from the Front-End
Visit the My Account page and click Submit Post option on the left side.
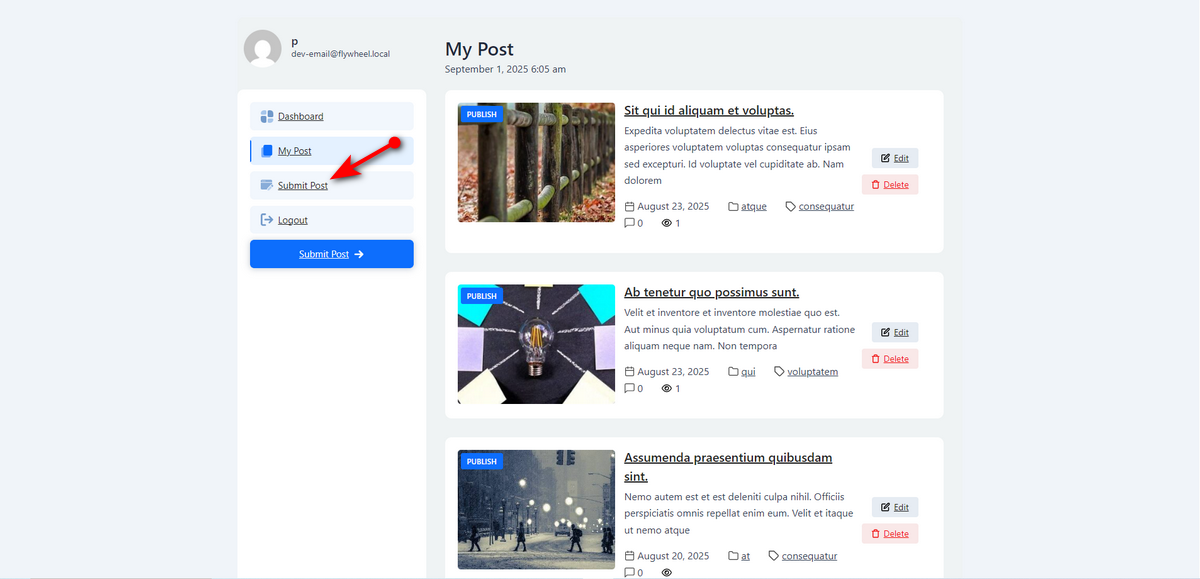
Now, write your post title, main content, and include media content. Set the post category and tag, and add a featured image. Finally, click the Submit Post button. Watch the animation below to know how to make a post submission with the Post Grid.
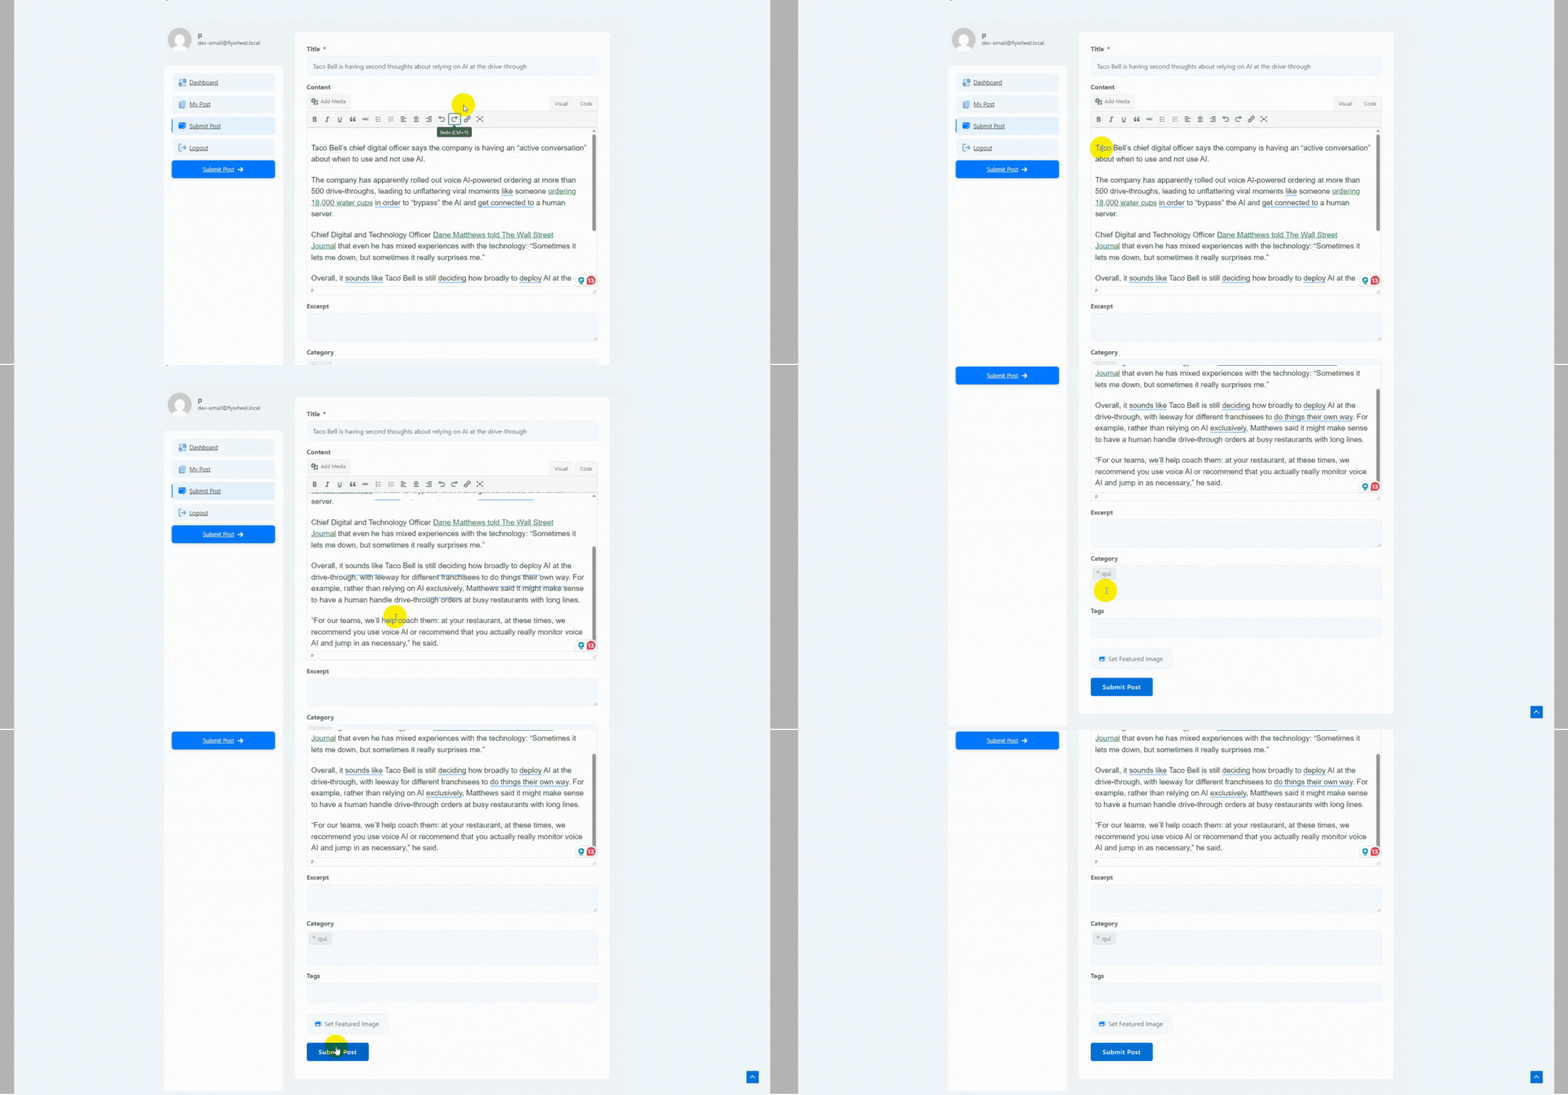
So, that’s how you can enable front-end blog submission with the Post Grid WordPress plugin.
Conclusion
That’s all about how to enable front-end blog submission with Post Grid in just a few minutes. Once you follow all the steps outlined above, you’re all set to encourage your community to contribute to your WordPress blog.
Now you just need to create a submission guideline page to help users know what kind of content you want them to submit. You can consider upgrading your blog further by featuring submitted posts in sliders. Read our guide on how to make post sliders in WordPress to get started.



