


On This Page
Want to redesign your WordPress website with stunning post displays? You can follow several ways to spice up your site. One of those methods is using the Divi theme. With it, you can easily build diverse post layouts, including grid, list, and slider formats!
How do you create a post grid, list, or slider in the Divi theme?
This guide will walk you through the simplest way to display your posts in your preferred style. It demonstrates everything from setup to customization, helping you enhance your site’s appearance. Let’s get into it.
How to Create Post Grid, List, and Slider in Divi Theme
There are numerous ways to create a post grid, list, and slider in the Divi theme. However, we’ll show you the easiest method to reach your goal. Let’s begin.
Step 1: Select the Best Post Grid Plugin
First, you need to choose the best WordPress plugin that lets you easily build posts in several layouts in the popular page builders. One such plugin is The Post Grid by RadiusTheme.
Whether you want to display posts in a grid, list, or slider layout using Elementor, Gutenberg, or Divi, this plugin allows you to do so. So, install it by following the steps in the next section.
Step 2: Install the Post Grid WordPress Plugin
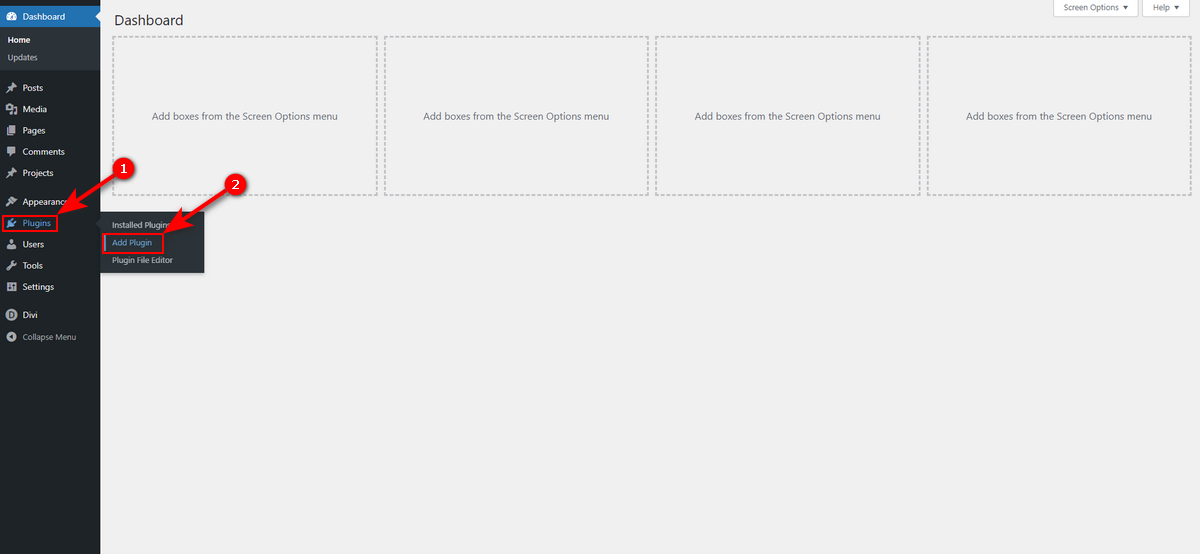
Installing a plugin is Super Simple. Head to your WordPress Admin Dashboard > Plugins > Add Plugin.
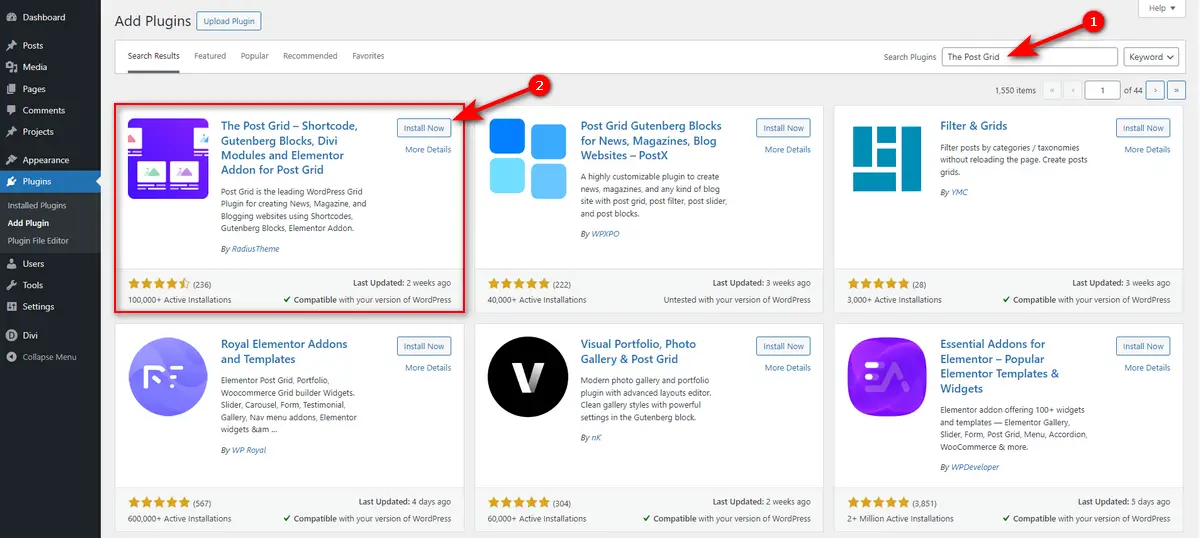
Now, type “The Post Grid” in the plugin search field in the top-right corner. Then, click “Install Now” button of the marked plugin in the screenshot below.
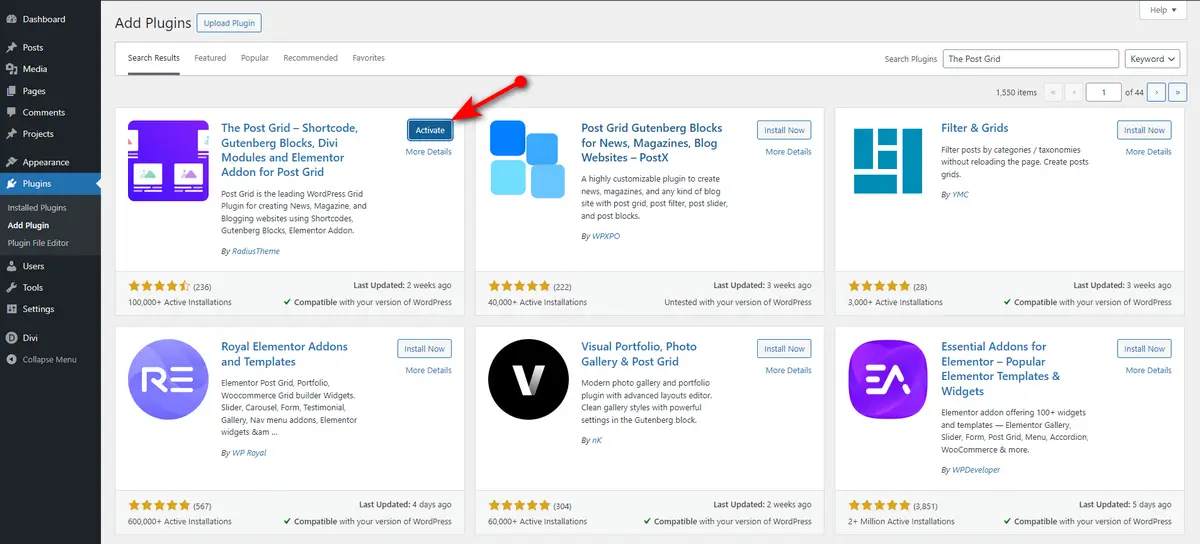
Finally, click ‘Activate‘ button to install and activate The Post Grid plugin.
Step 3: Create a Post Grid Layout for All Posts in Divi
Now, we’ll create a post grid layout using the Divi Theme Builder and The Post Grid plugin. Remember to have some posts on your WordPress website before you showcase them in the grid layout.
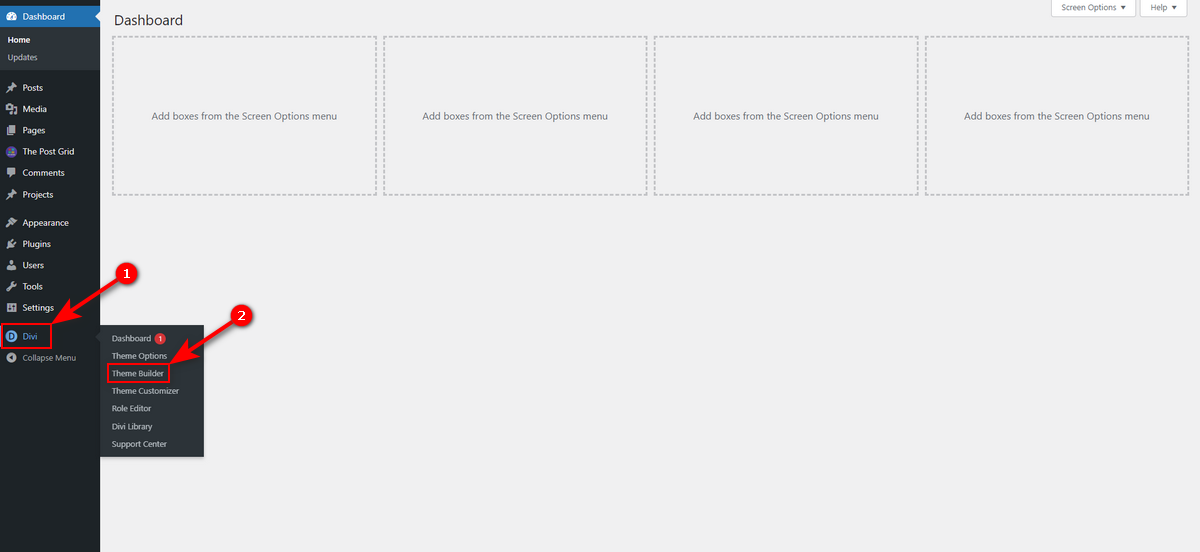
To build the grid layout in Divi with The Post Grid plugin, navigate to the WordPress Admin Dashboard > Divi > Theme Builder.
After that, click ‘+‘ symbol to add a new template.
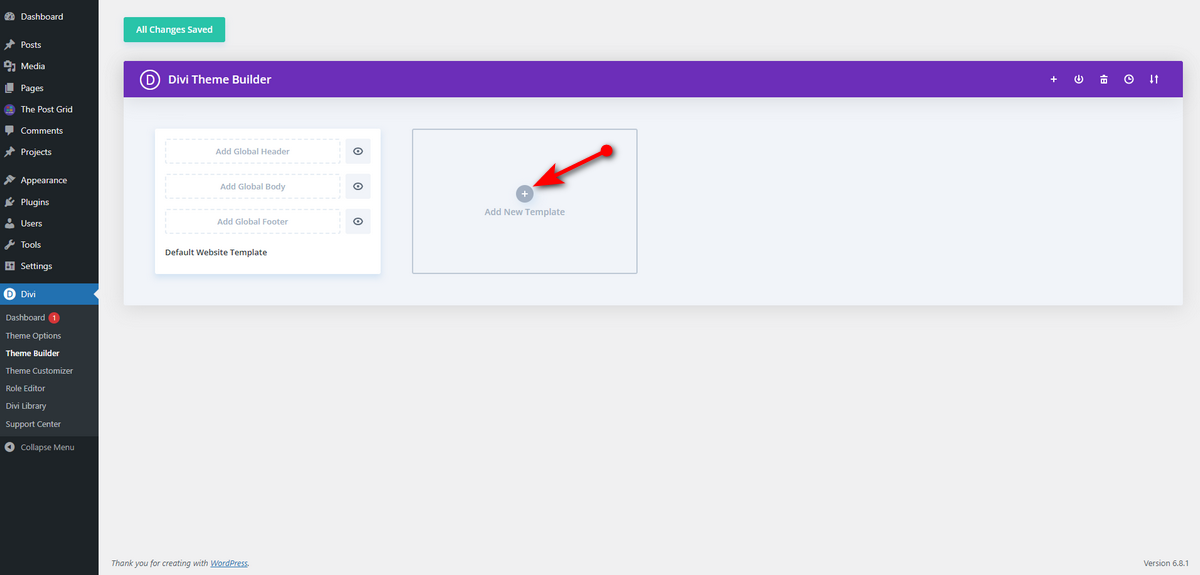
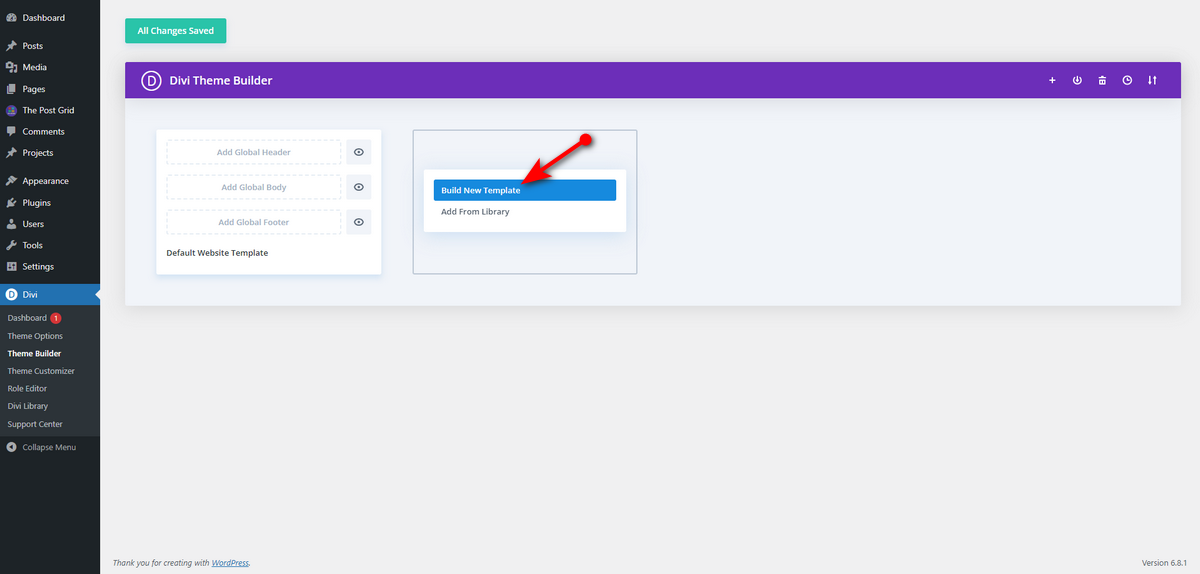
Now, hit “Build New Template.”
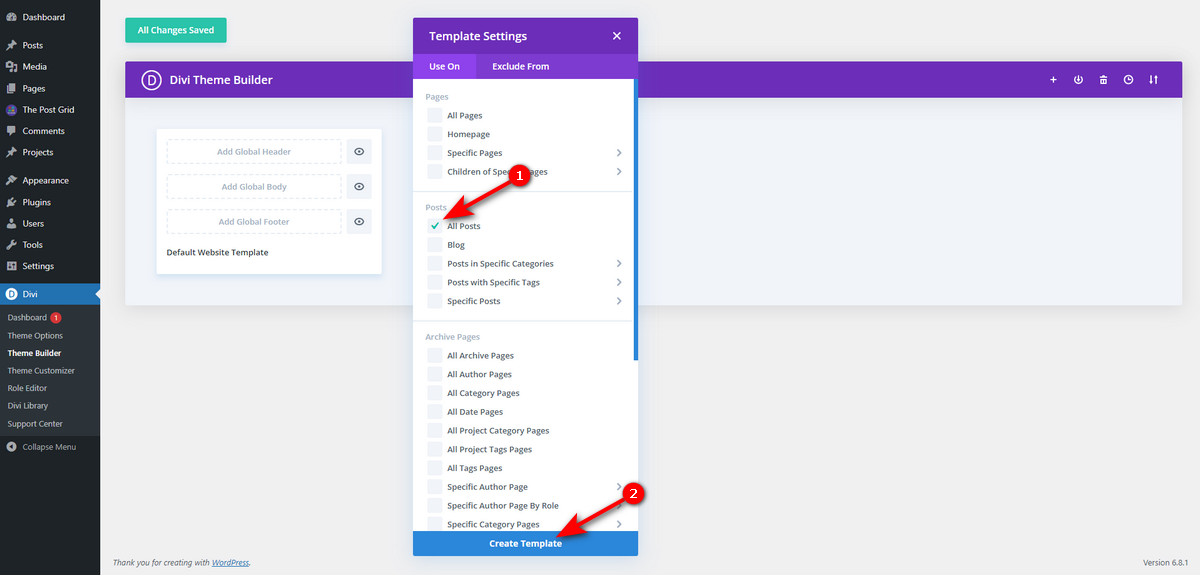
Tick “All Posts” box and press “Create Template” button in the “Template Settings” of Theme Builder.
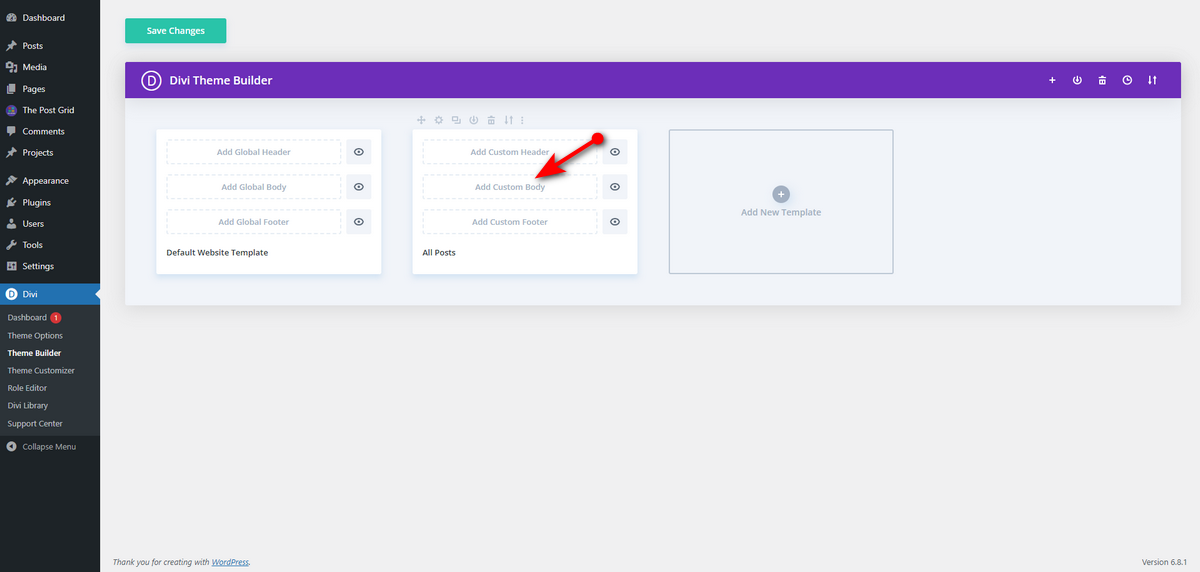
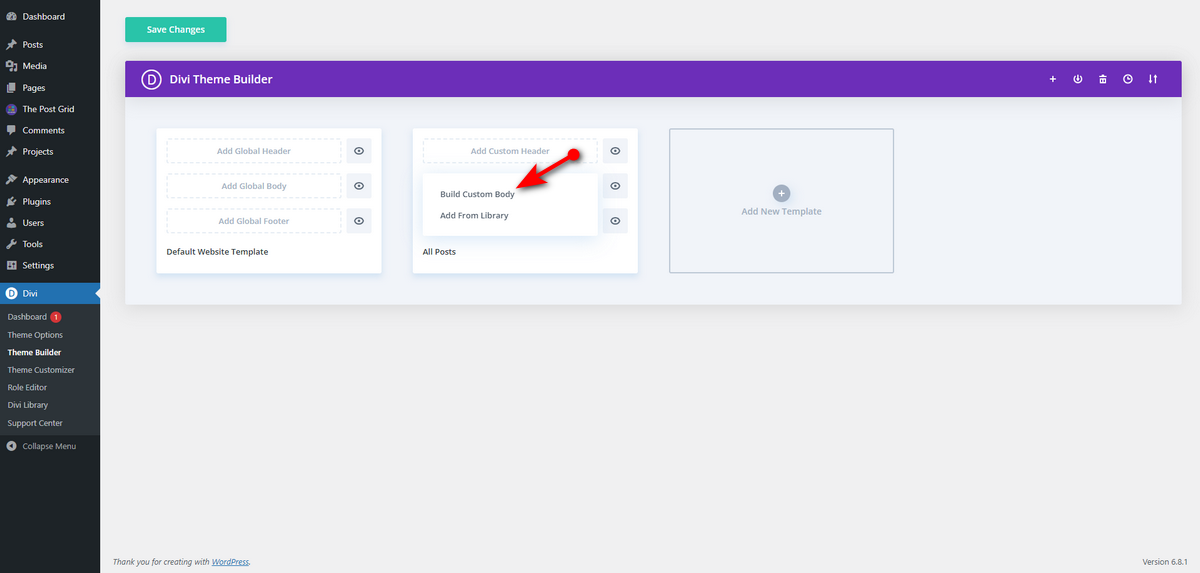
You can now see options to create a custom header, body, and footer for all posts. Click on “Add Custom Body” option.
Now, select “Build Custom Body” option.
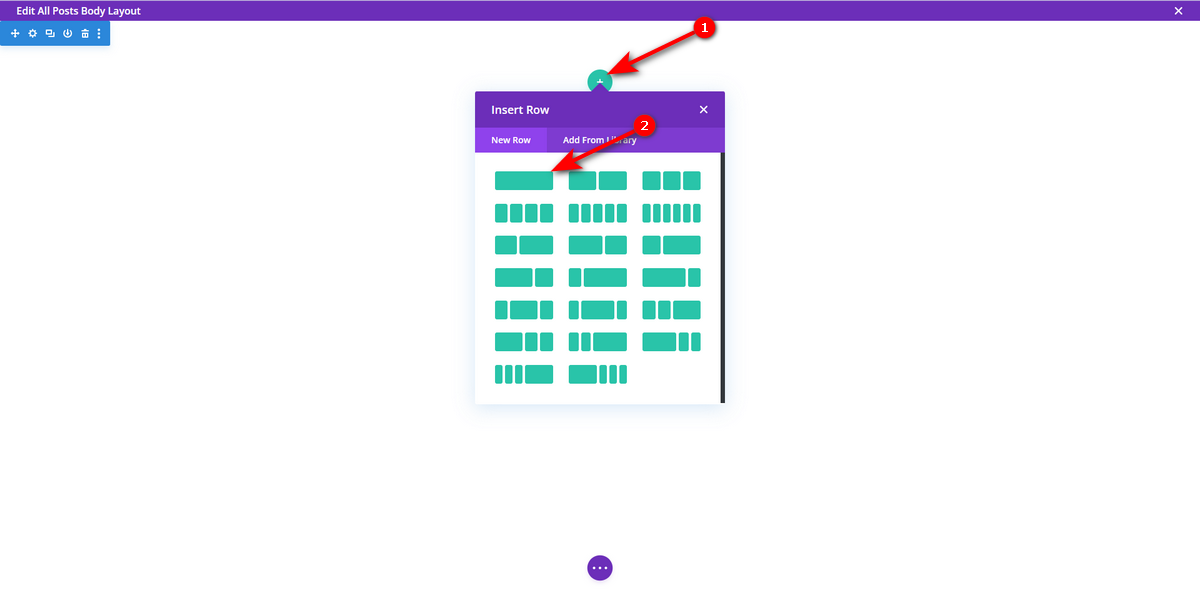
You’ll then visit the Divi editor. Click ‘+‘ symbol and select a row you prefer.
Now, scroll down and hit the “The Post Grid Module.”

At this point, choose the “Grid Layout” module.

You can now view all your posts in a grid format within the Divi editor.
Customize the layout and other elements according to your wish, and then click the sign icon on the “Grid Layout Settings” panel to save your changes. Watch the animation below to understand the customization better.

Step 4: Build a List Layout in Divi
To create a list layout in Divi, you need to follow most of the steps you followed to build a grid layout. That means entering the Divi builder, clicking the ‘+‘ icon, and selecting a row, then choosing the “The Post Grid Module.” Finally, press “List Layout” module.

You’ll now see all the posts in list format. Customize the layout using the “List Layout Settings” panel and save your changes as you did during grid layout customization.

Step 5: Make a Post Slider Layout in Divi
We’ll now build a slider layout to display all the posts in a slider. We’ll build it within the Divi editor using The Post Grid plugin. However, before moving forward, we would like to inform you that, to date, you can create grid and list layouts for free.
However, when it comes to building the slider layout, you should opt for the Pro plan of The Post Grid WordPress plugin. Therefore, obtain the Pro version and activate it with your license key.
After that, open the Divi editor, add a row, click the “The Post Grid Module,” and select the “Slider Layout.”

Now, customize the layout according to your preference.

That’s how easily you can build a post slider in Divi with The Post Grid Pro WordPress plugin.
Additionally, the plugin enables you to accomplish much more. We encourage you to read its documentation to learn more about the plugin.
Our Concluding Thoughts
Now you know how to create a post grid, list, and slider in the Divi theme by following the steps we shared in this article. As you are aware, we utilized the Post Grid plugin by RadiusTheme to accomplish this task. We found it super intuitive, enabling you to display your posts in stylish layouts.
It allowed us to create a grid and list layouts for free. But for slider layouts, we needed the Pro version. The Pro version unlocks many more features, allowing us to design post layouts professionally. Hence, the premium plugin is worth the money, and you may use it too.



