
To configure the General Settings, navigate to Food Menu → Settings → General from your WordPress admin dashboard.
This page lets you configure the foundational preferences for your restaurant — including branding, menu type, and visual options used across every module.
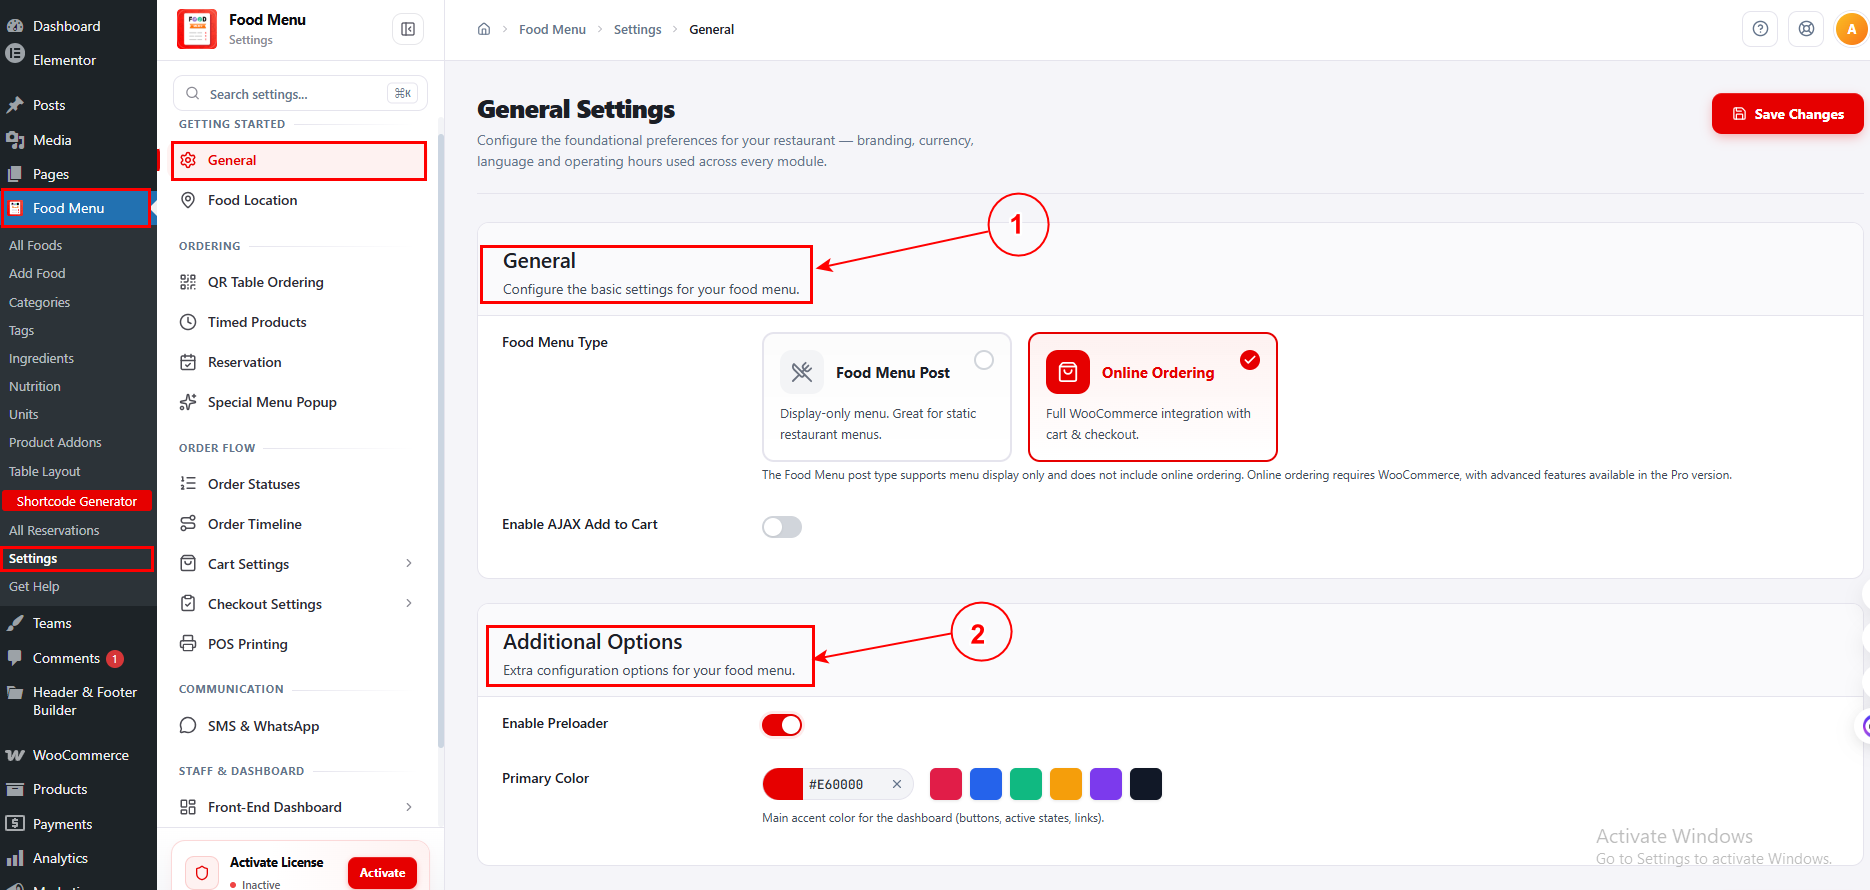
1. General #
This section covers the basic settings for your food menu.
- Food Menu Type: Choose how your food menu operates. Two options are available:
Food Menu Post – A display-only menu. Great for static restaurant menus where you just want to showcase your items without any ordering functionality.
Online Ordering – Full WooCommerce integration with cart and checkout. Select this if you want customers to place orders directly from your menu. Note: Online ordering requires WooCommerce, with advanced features available in the Pro version.
- Enable AJAX Add to Cart: Toggle this option to allow customers to add items to the cart without reloading the page. This provides a smoother and faster ordering experience on the front end.
2. Additional Options #
This section provides extra configuration options for your food menu.
- Enable Preloader: Turn this on to display a loading animation while the menu content loads. This ensures a smoother visual experience for visitors, especially on pages with many menu items.
- Primary Color: Set the main accent color used throughout the plugin’s dashboard and front-end elements — including buttons, active states, and links. You can enter a custom hex color code (e.g., #E60000) or pick from the preset color swatches (pink, blue, green, yellow, purple, and black).
3. Currency Settings (Food Menu Post Type Only) #
When Food Menu Post is selected, these currency options appear to control how prices are displayed.
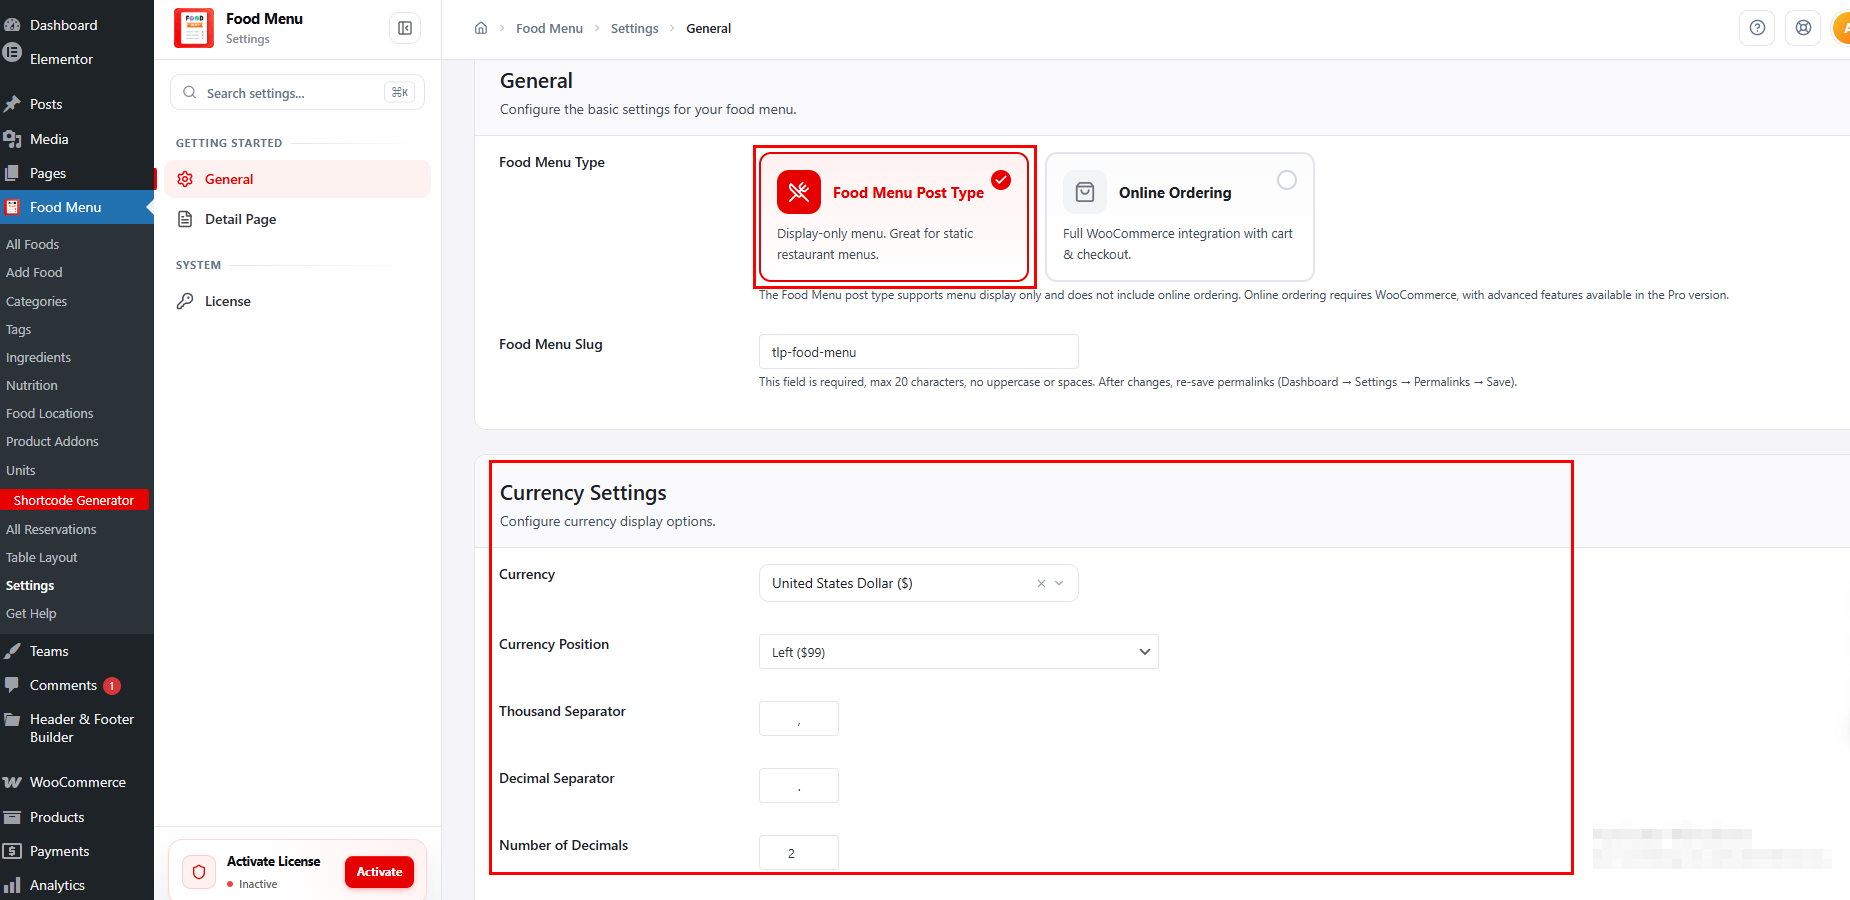
Currency – Select your currency from the dropdown (e.g., United States Dollar ($)). This determines the currency symbol displayed with prices.
Currency Position – Choose where the currency symbol appears relative to the price:
Left ($99) – Symbol before the amount
Right (99$) – Symbol after the amount
Thousand Separator – Enter the character used to separate thousands (e.g., , for 1,000 or . for 1.000).
Decimal Separator – Enter the character used for decimal points (e.g., . for 10.99 or , for 10,99).
Number of Decimals – Set how many decimal places to display (e.g., 2 for 10.99 or 0 for 11).


