
This documentation is valid for Classima 2.95.2 and upper versions. #
To setup push notification, you need to follow the below steps:
1. Configuring schema in admin panel
Open classified listing > settings > app . Now put a same value for the app under App schema. (only lowercase alphabets)

2. Configuring schema in app.json
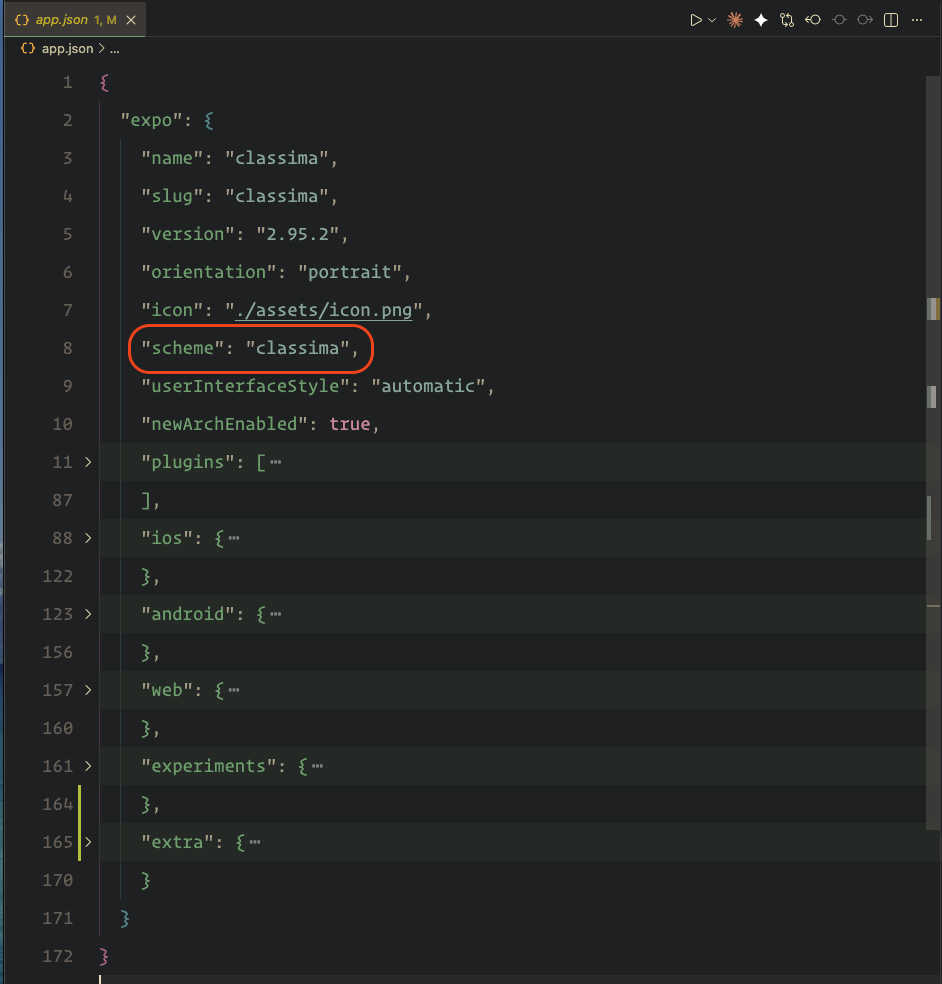
You need to open your app.json file and add a custom url schema under scheme key. See the image.
3. Configuring firebase app
a. (If you already configured google login, and added google-services.json file, go to step 4)
If you have not already created a Firebase project for your app, do so now by clicking on Add project in the Firebase Console.
b. In your new project console, click Add Firebase to your Android app and follow the setup steps. Make sure that the Android package name you enter is the same as the value of android.package in your app.json. And similarly add iOS project for ios App.
(Android only) Go to your Firebase project’s settings, scroll down to “Your apps” and select your Android app. Under SHA certificate fingerprints, click Add fingerprint, and add Google Certificate Fingerprint.
You’ll get Google Certificate Fingerprint by following steps:
(You need to build your app once before these steps to generate credentials)
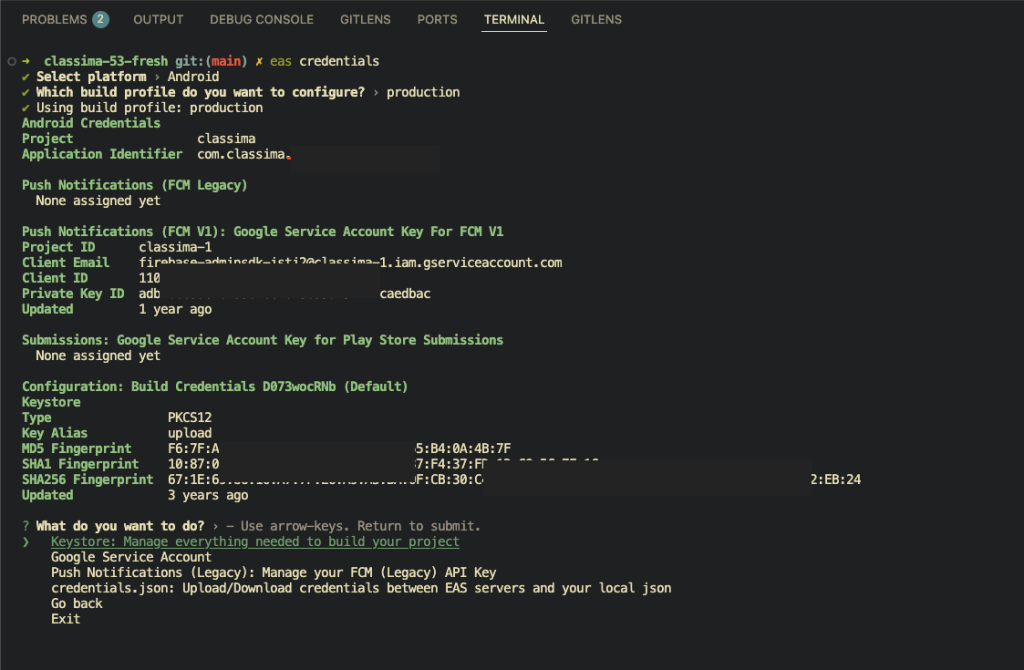
– run eas credentials
– Select Android
– Select profile (production)
– You’ll get all the credentials in the console. From here copy the “SHA1 Fingerprint“. This SHA1 Fingerprint is Google Certificate Fingerprint.
*** If you haven’t already run eas build -p android for this project, you’ll need to do that first before getting the Google Certificate Fingerprint.
- Download the
google-services.jsonfor android andGoogleservice-info.plistfile for iOS and place it in your app’s root directory.


- In your app.json, add an
android.googleServicesFilefield with the relative path to thegoogle-services.jsonfile you just downloaded. If you placed it in the root directory, this will probably look like . Similarly do for iOS. see below code.
{
  ...
  "ios" : {
    "googleServicesFile": "./GoogleService-Info.plist"
    ...
  }
  ...
  "android": {
    "googleServicesFile": "./google-services.json",
    ...
  }
}
4. Uploading Server Credentials
- Go to firebase console and select your app
- From the top click the gear icon and select project settings

- Go to Service accounts and click Generate new private key and finally click Generate key on the pop up.


- A new json file will be downloaded.
- Now go to your expo account and select the project
- After selecting project, from left sidebar select Credentials under Project Settings

- Then select your android Application Identifier

- Scroll down and click add a service account key under FCM V1 service account key

- On the pop up click Select file and select the downloaded json file
- After selecting, click the Save button.

5. Finally go to app > services > miscConfig.js and put “true” for “enablePushNotification”

That’s it — users who run this new version of the app will now receive notifications through FCM using your project’s credentials.
– After configuring Push notification , please create a new build and test with that. Older build might produce errors.
6. After you upload the app in play store and get approved, you need to log in to your play console account and select your published app. On the next page from left sidebar, select “Test and Release” > “App Integrity”. Scroll down to “Play app signing” and click “Settings”. Copy the “SHA-1 certificate fingerprint” under “App signing key certificate”.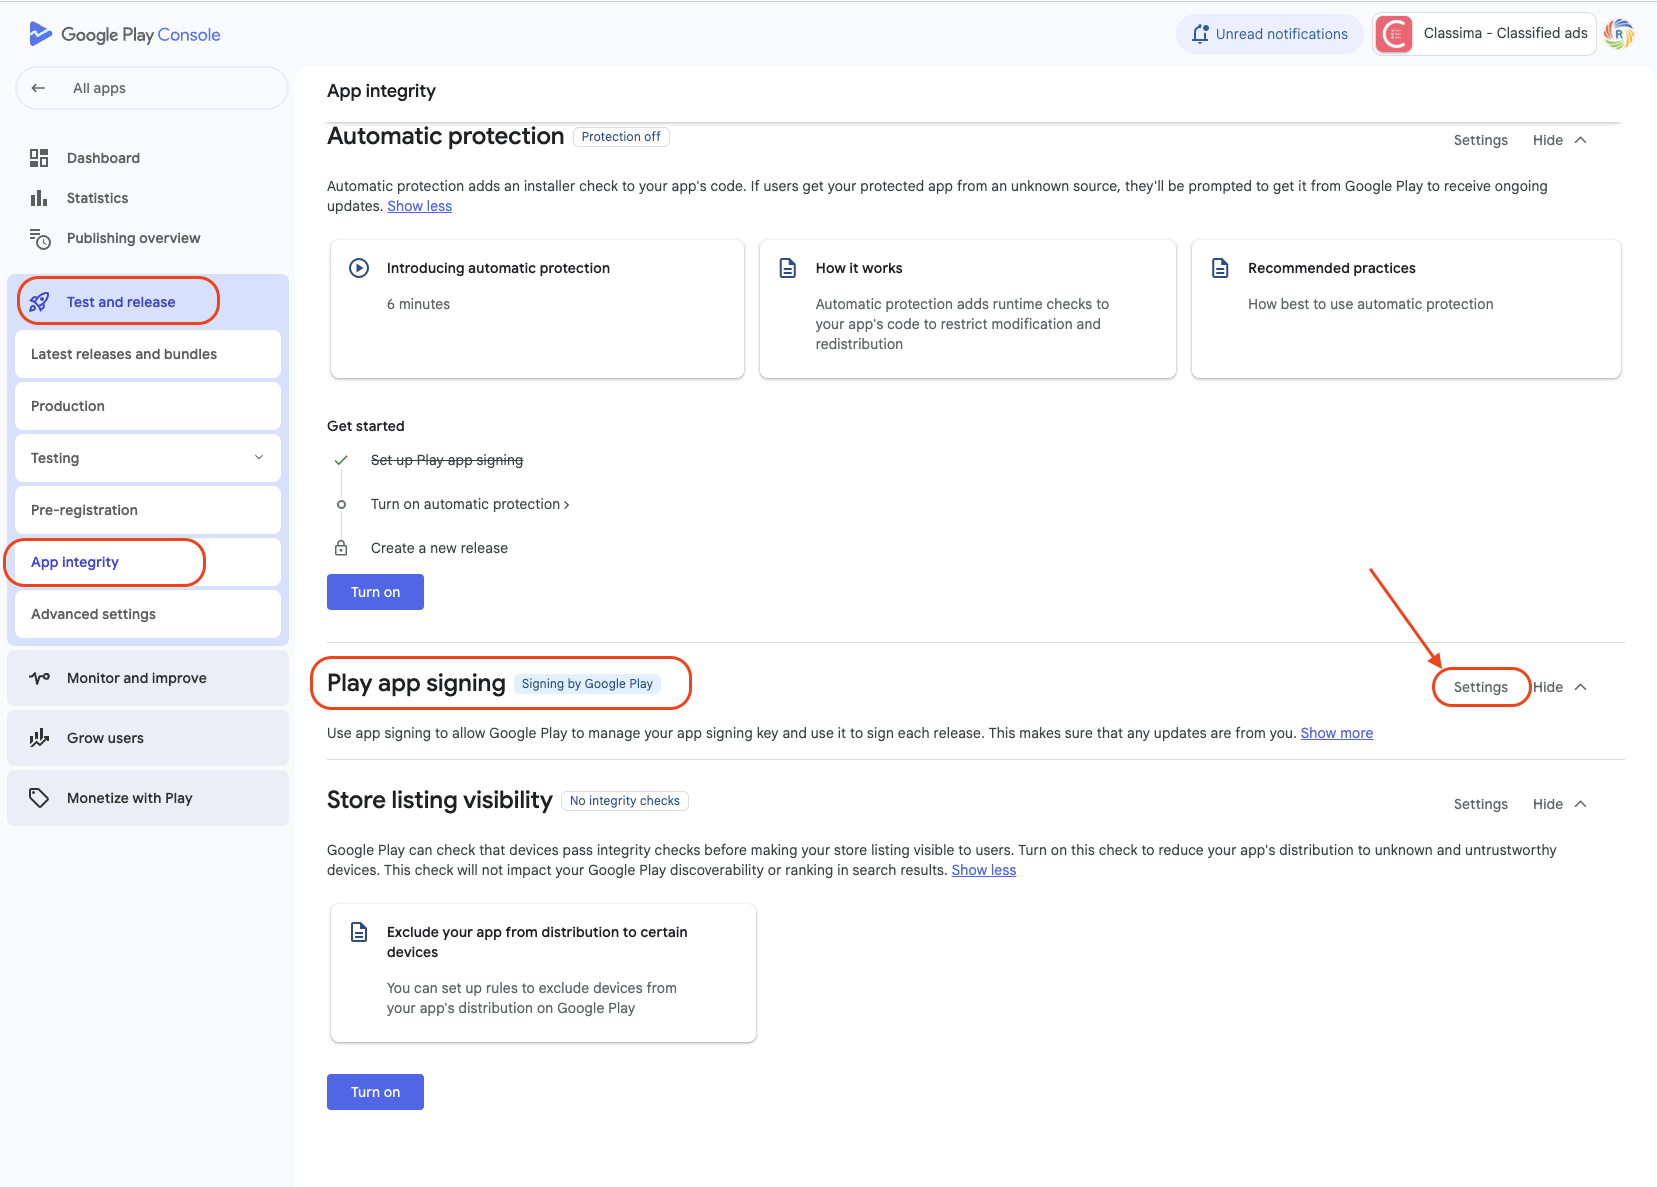
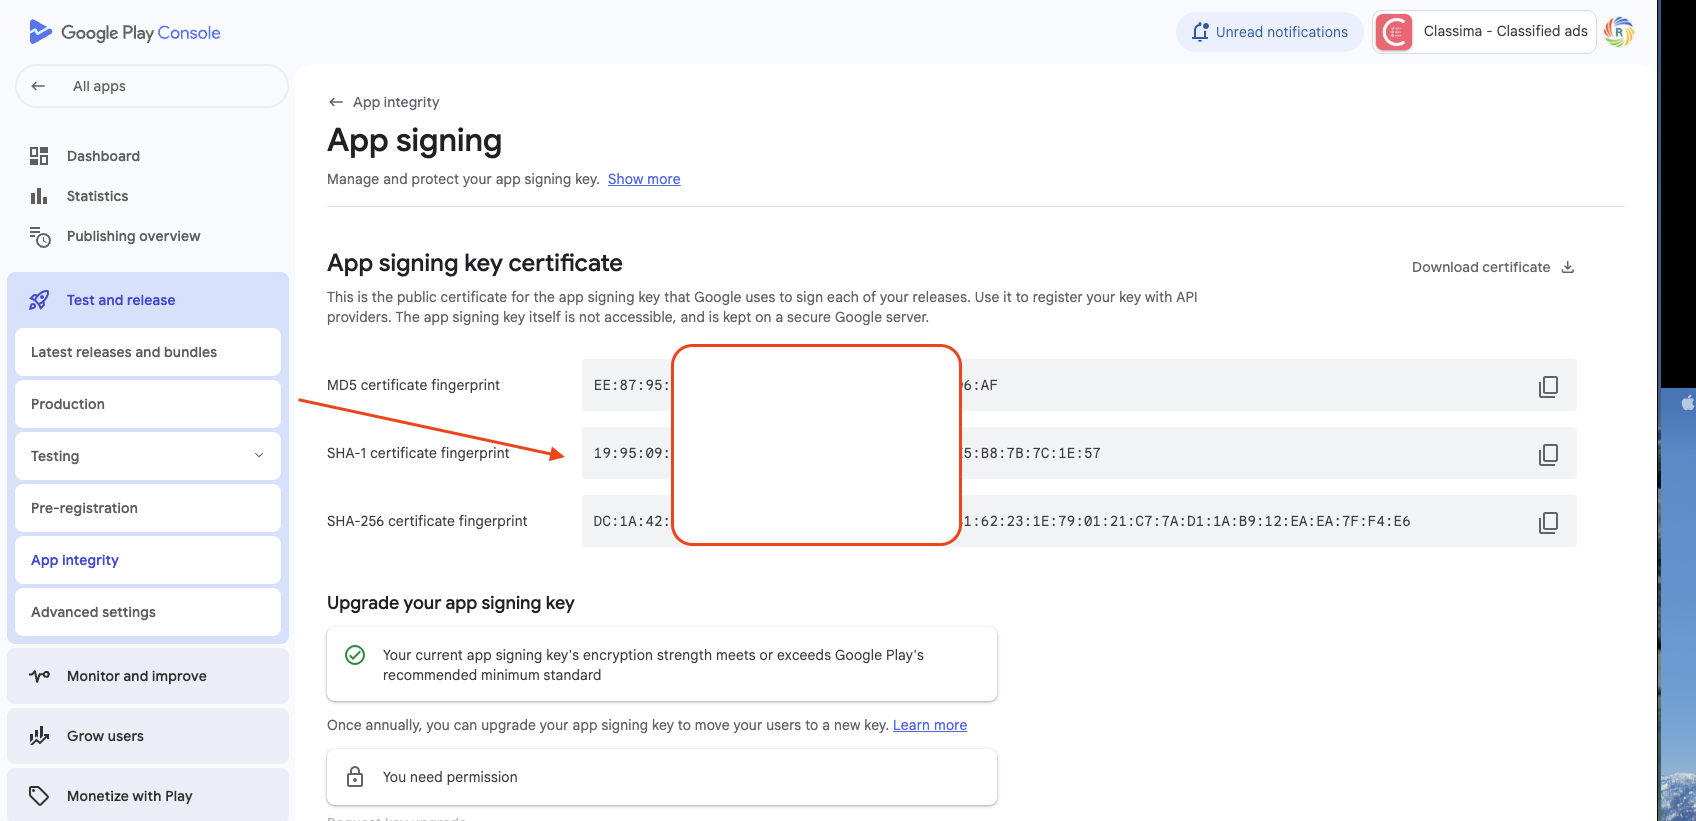
Go to your firebase project, open the android app you created in step 2. Now add the “SHA-1 certificate fingerprint” to your project.
Similarly Copy the “SHA-256 certificate fingerprint” And add it to firebase project.
If you miss this step, push notifications might not work in apps downloaded from play store.


