• Classified Listing Docs
    • Classified Listing Plugin
    • Classified Listing All Addons
    • Classified Listing Mobile App
    • Classima Mobile APP
    • Listygo Mobile App
    • Homlisti Mobile App
  • Woocommerce Plugins Docs
    • ShopBuilder Elementor Addon
    • Woo Variation Swatches
    • Woo Variation Gallery
    • Zilly Mobile App
  • General Plugins Docs
    • The Post Grid
    • Testimonial Slider
    • Team Members
    • Food Menu
    • Review & Schema
    • Portfolio
    • Business Review
  • Our Plugins
    • The Post Grid
    • Classified Listing
    • ShopBuilder
    • Food Menu
    • Team
    • Portfolio
    • Testimonial Slider
    • Review & Schema
    • See All Plugins
  • Get Pro
×
  • Classified Listing Docs
    • Classified Listing Plugin
    • Classified Listing All Addons
    • Classified Listing Mobile App
    • Classima Mobile APP
    • Listygo Mobile App
    • Homlisti Mobile App
  • Woocommerce Plugins Docs
    • ShopBuilder Elementor Addon
    • Woo Variation Swatches
    • Woo Variation Gallery
    • Zilly Mobile App
  • General Plugins Docs
    • The Post Grid
    • Testimonial Slider
    • Team Members
    • Food Menu
    • Review & Schema
    • Portfolio
    • Business Review
  • Our Plugins
    • The Post Grid
    • Classified Listing
    • ShopBuilder
    • Food Menu
    • Team
    • Portfolio
    • Testimonial Slider
    • Review & Schema
    • See All Plugins

Getting Started

3
  • System Requirements
  • Installation
  • How to Use (Video)

Plugin Settings

9
  • Active License
  • Common Settings
  • Pop Up Field Selection (PRO)
  • Social Share (PRO)
  • Custom Script
  • AI Integration
  • My Account
  • Event Settings
  • Other Settings

Shortcode Generator

6
  • Style
  • Fields Selection
  • Settings
  • Layout Settings
  • Query Build
  • Front-end Filter

Use Shortcode in Page

4
  • Use Shortcode in Page
  • Use Direct Shortcode
  • Use Elementor Addon
  • Use Gutenberg Addon

Create Different Layouts

6
  • Create List Layout
  • Create Grid Layout
  • Create Grid Filter Layout
  • Create Carousel Slider Layout [PRO]
  • Create WooCommmerce Layout [PRO]
  • Create Easy Digital Downloads Layout [PRO]

Elementor Addons

11
  • Elementor Settings
  • Overview
  • Archive / Single Page Builder
  • Create Front-end Filter
  • Create Slider Layout [PRO]
  • Create List Layout
  • Create Grid Hover layout
  • Create Grid Layout
  • Style Tab
  • Settings Tab
  • Content Tab

Gutenberg Blocks

9
  • Import Layouts and Sections
  • Create Slider Layout [PRO]
  • Create List Layout
  • Create Grid Hover layout
  • Create Grid Layout
  • Style Tab
  • Settings Tab
  • Content Tab
  • Overview

Divi Modules

10
  • Divi Video Tutorial
  • Overview
  • Build Page With Divi
  • Create Grid Layout
  • Create Grid Hover Layout
  • Create List Layout
  • Create Slider Layout
  • Front End Filter Settings
  • Content Tab
  • Design Tab

Features

6
  • Event Integration with The Post Grid [PRO]
  • Front End Submission [PRO]
  • Chat GPT Integration [PRO]
  • Set Archive Layout [PRO]
  • Custom Post Type (CPT) [PRO]
  • Taxonomy Ordering [PRO]

How to Use

5
  • How to Display a Specific Category Page Using Post Grid
  • How to use ACF Plugin?
  • How to Improve Performance?
  • How to Renew a License
  • How to Use Video?

Frequently Asked Questions

4
  • How to make a Custom Read More link?
  • Image Scroll down on Hover
  • How to remove the Import button from gutenberg editor
  • How to Override Layout
  • Home
  • Docs
  • Plugin Settings
  • My Account
View Categories

My Account

1 min read

Now, you can perform settings on your My Account page.

6.1) My Account Page: Choose My Account Page. Users must insert the shortcode [tpg_my_account] in the page.
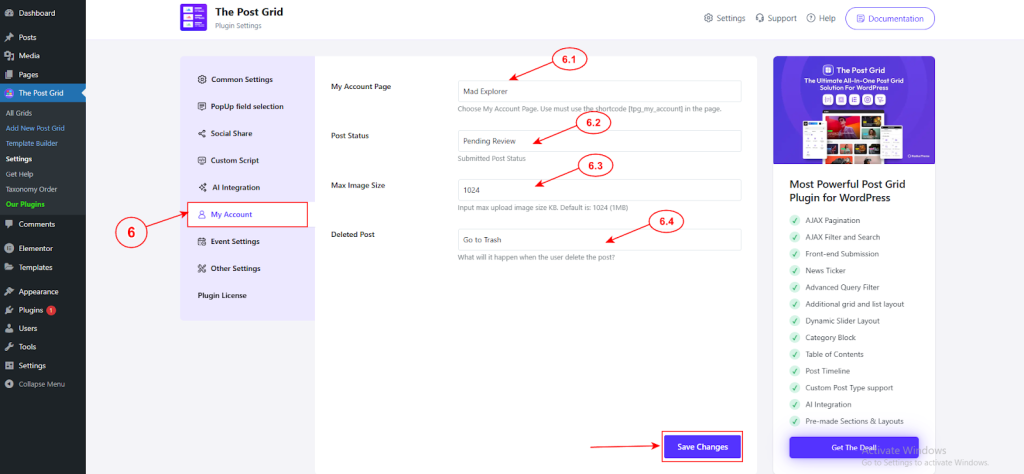
6.2) Post Status: Choose the post status. You can select from Pending review, Draft, Private, Publish.

6.3) Max Image Size: Determine maximum upload image size KB. Default is: 1024 (1MB).

6.4) Deleted Post: Set the condition of what will happen when the user deletes the post.

Click on the ‘Save Changes’ button to update all the settings. 

Front End Submission From Dashboard #

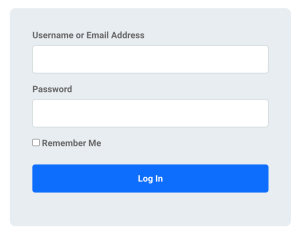
Now, when a user visits the frontend of the “My Account” page without being logged in, they will see the login screen. After logging in, they will access the dashboard menu. 
Dashboard

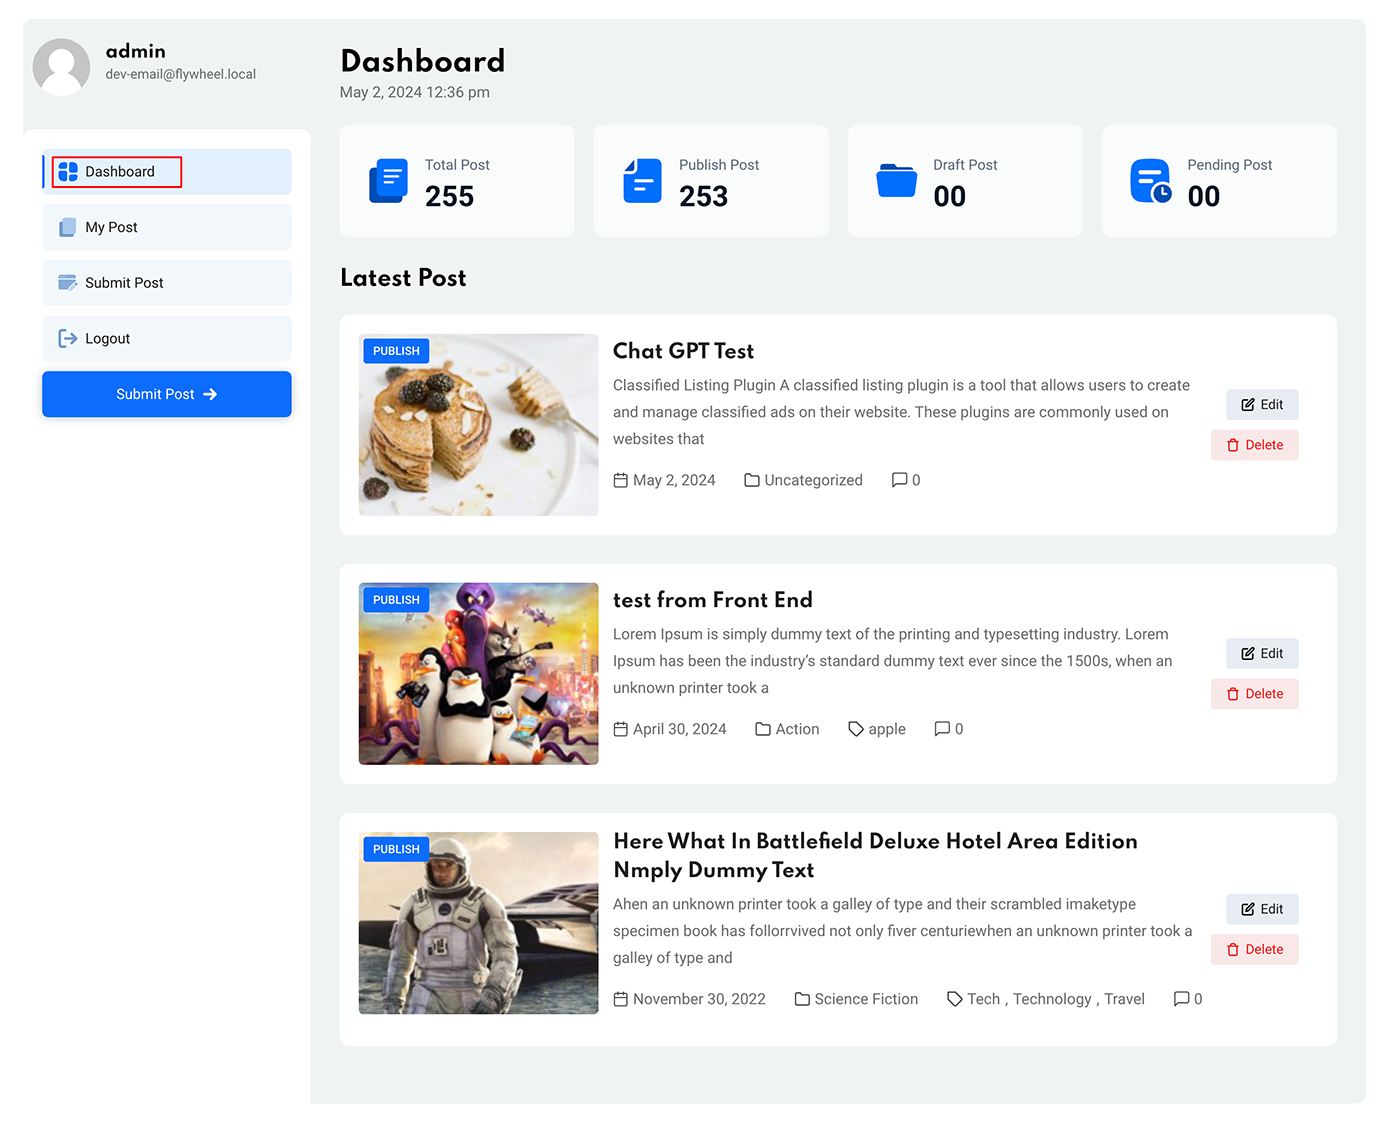
After logging in, users will view a dashboard. Here, they can see total posts, published posts, draft posts, and pending posts numbers. 
My Post

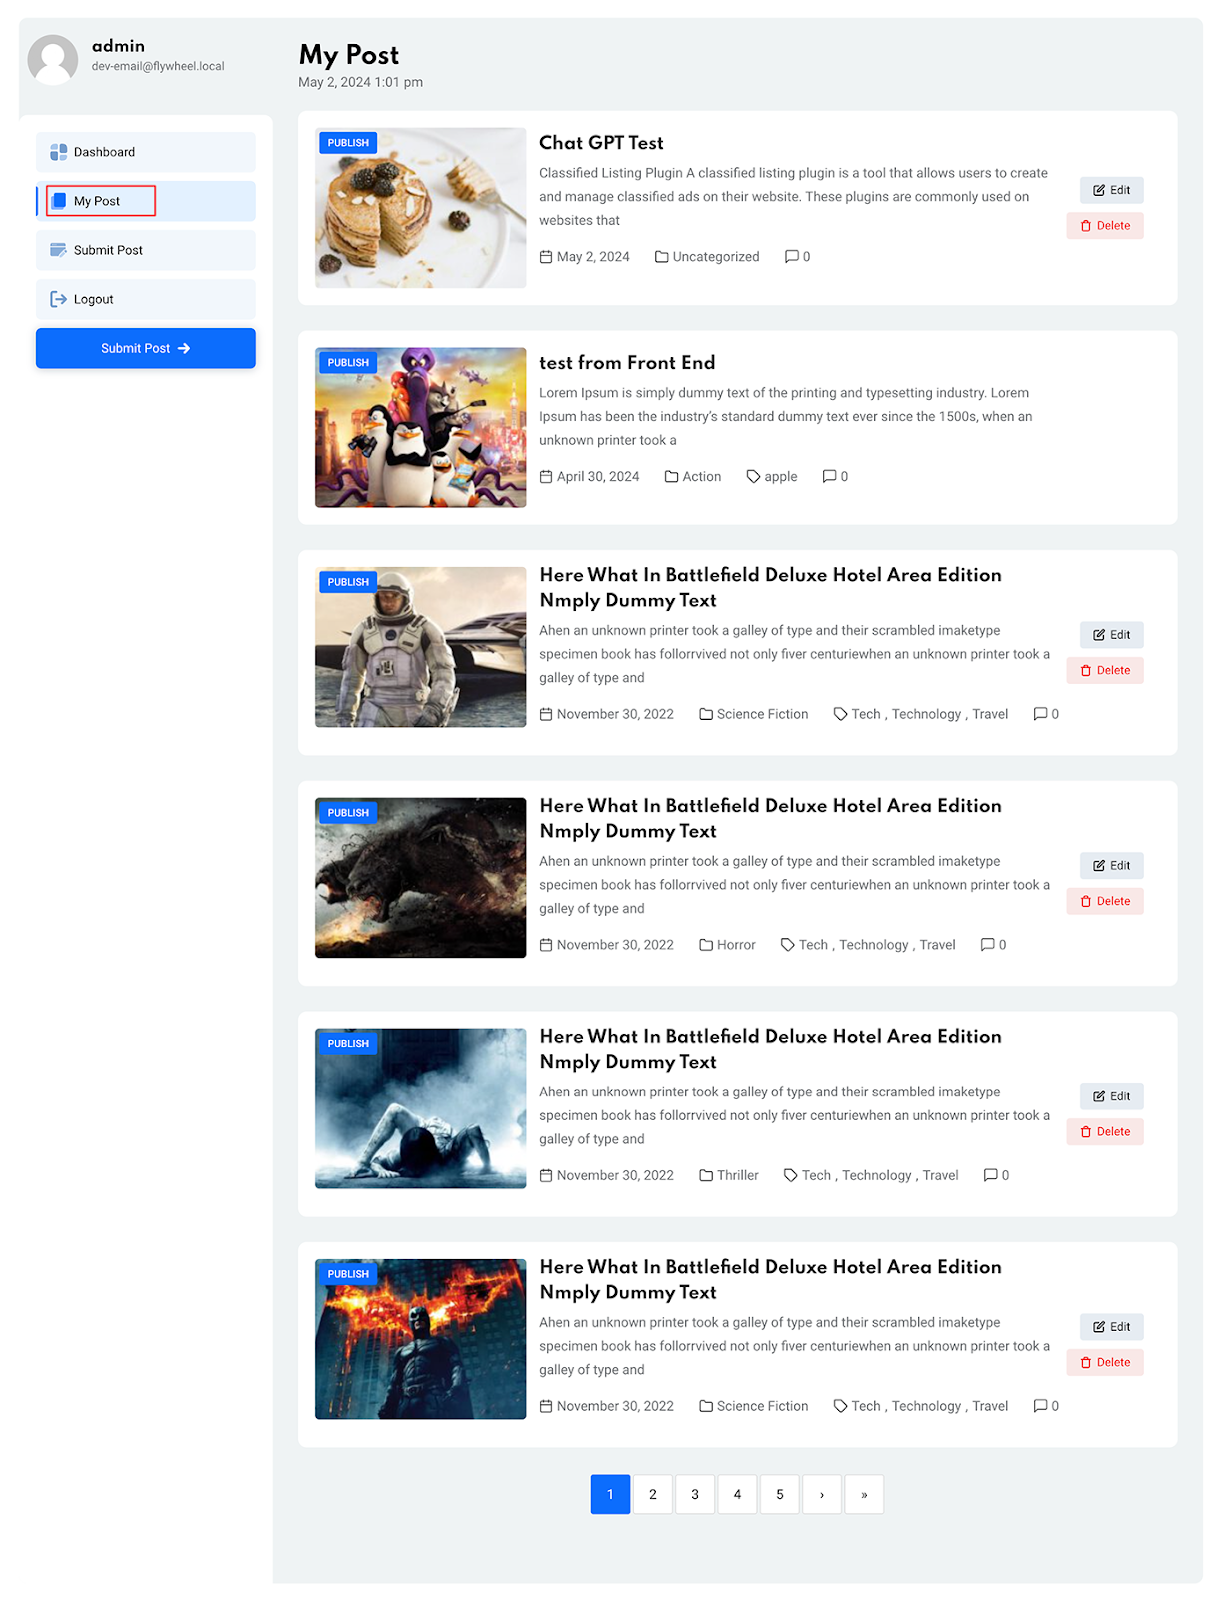
Users can view all the posts they’ve submitted from the My Post tab. From here, they can independently delete or edit any particular posts. 
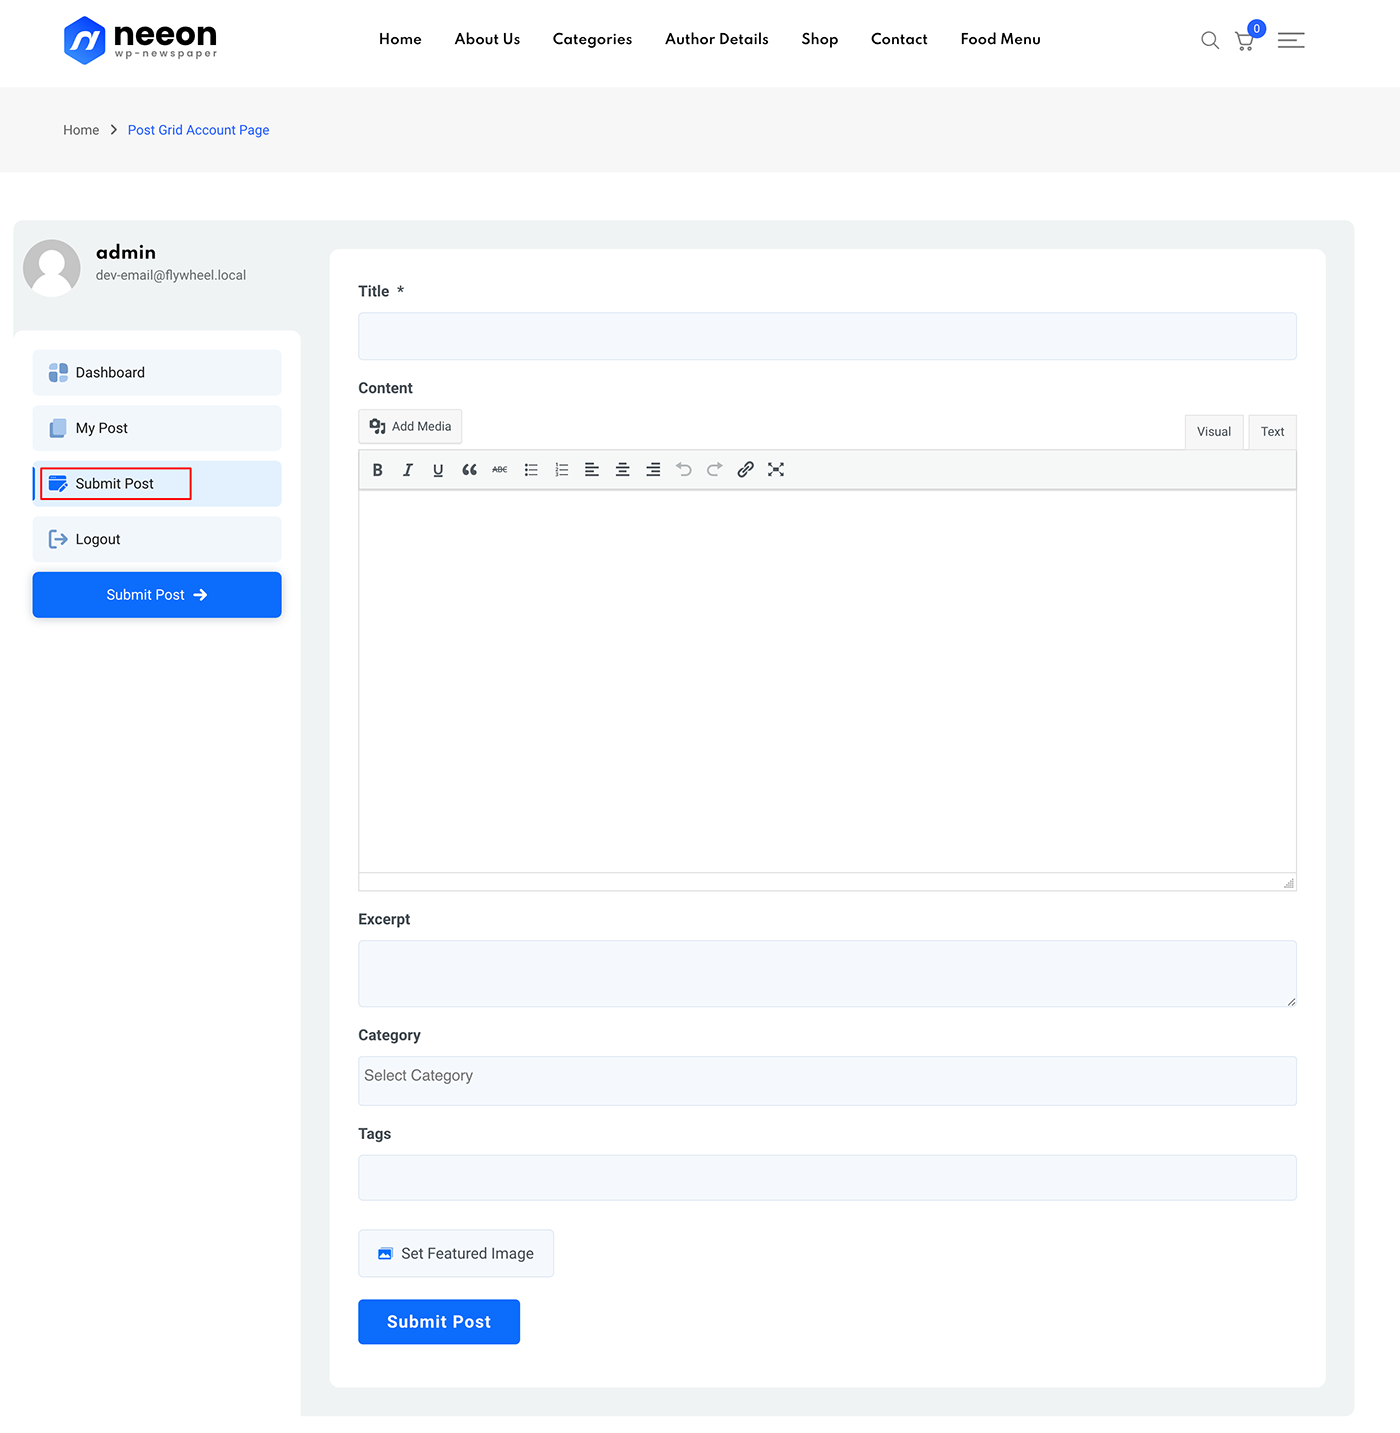
Front End Submission Form

Here, users can effortlessly submit their posts. They need to insert an appropriate title for the post. After that, add excerpts, determine the category, and add tags for the post.

Lastly, they can set featured image for the post and click on submit post. 
What are your Feelings

Share This Article :

  • Facebook
  • X
  • LinkedIn
  • Pinterest
Still stuck? How can we help?

How can we help?

Updated on November 25, 2025
AI IntegrationEvent Settings
Table of Contents
  • Front End Submission From Dashboard
Copyright© 2026 RadiusDocs by RadiusTheme