
The bundle widget renders on your product pages through Shopify’s theme extension system. There are two components to enable:
- The App Embed — global scripts and styles that the widget needs to function. Enable this once.
- The Widget Block — the visible bundle widget you place on a product page template. Add this to each template where you want bundles to appear.
Both are configured in the Shopify theme editor, not inside the Radius Bundles app.
Step 1: Enable the App Embed #
Follow these steps to enable the App Embed from the Radius Bundles dashboard:
- In the Radius Bundles dashboard, find the setup guide at the top of the page.
- On the step “Enable the app embed”, click Open theme editor. This opens your Shopify theme editor in a new tab with the app embed section pre-selected.
- In the theme editor, find the Radius Bundles toggle under App embeds and switch it on.
- Click Save in the theme editor.
- Return to the Radius Bundles dashboard and click Check status on step 1. The step should show as complete.
If you dismissed the setup guide, reach the theme editor directly:
- In Shopify admin, go to Online Store → Themes.
- Click Customize on your active theme.
- In the left panel, click the puzzle-piece icon (App embeds).
- Find Radius Bundles and toggle it on.
- Click Save.
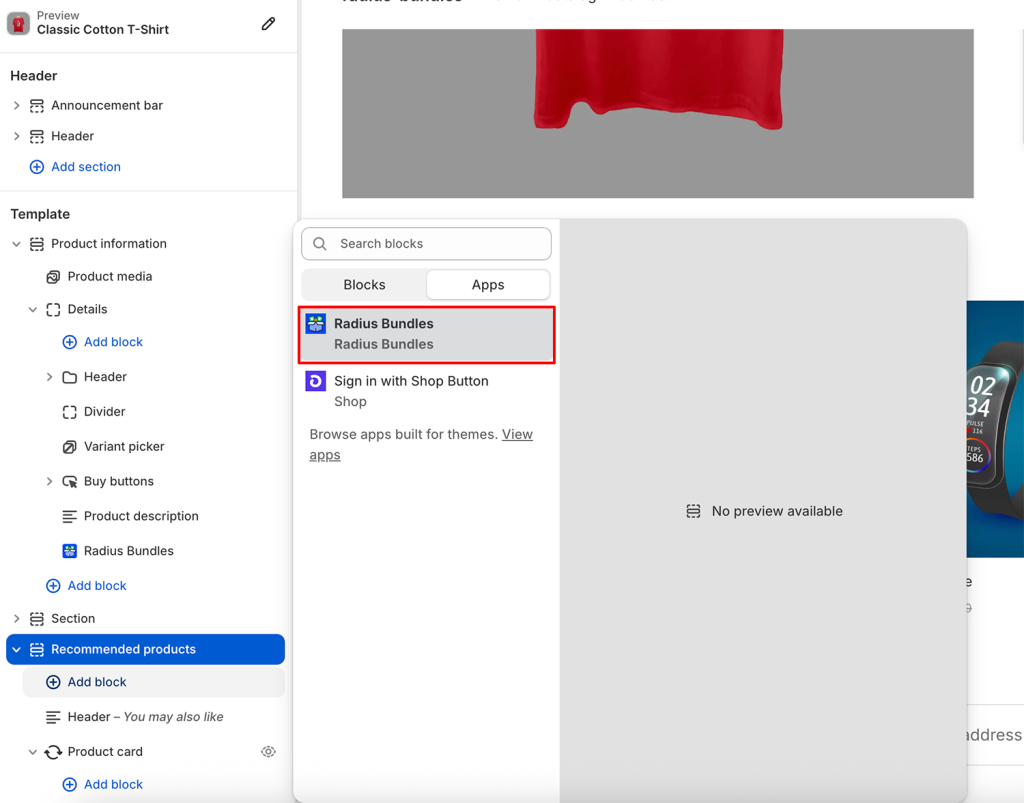
Step 2: Add the Widget Block to Your Product Page #
The widget block places the bundle widget on a specific page template. You need to add it to your product page template (and any other templates where you want widgets to appear).
- In the Shopify theme editor, navigate to a product page by clicking Products → All products in the left panel and selecting a product, or navigating to a product page in the storefront preview.
- In the left panel under the page sections, look for an Add block button inside the section list. Some themes call it Add section instead.
- Search for Radius Bundles or look under Apps.
- Click the Radius Bundles block to add it.
- Drag it to the position where you want the widget to appear — typically below the product form (title, price, add to cart button) or below the product description.
- Click Save.
The block is now part of your product page template. It will appear on every product page that uses this template, but only render a widget if that product belongs to at least one active bundle.
Verifying It Works #
- Open a product that belongs to an active bundle in a browser (not the theme editor preview).
- The bundle widget should appear at the position you set.
- If you see the widget but it shows no products, the bundle may be in DRAFT status — switch it to ACTIVE from the bundle list.
If the widget doesn’t appear at all:
- Confirm the App Embed is enabled (Step 1 above).
- Confirm the Widget Block was added and saved.
- Confirm the bundle is ACTIVE and includes the product you’re viewing.
Multiple Templates #
If your store uses different page templates for different product categories, you’ll need to add the Widget Block to each template separately. For example, if you have a “Clothing” product template and an “Accessories” product template, add the block to both.
Positioning the Widget #
In the theme editor, you can drag the Widget Block to different positions within the page layout. Common placements:
- Below the add-to-cart form: Shows the bundle immediately after the buy button — good for impulse purchases.
- Below the product description: Less intrusive, good for stores where the product description is primary.
- Above the product images: Works for some themes, but test carefully on mobile.
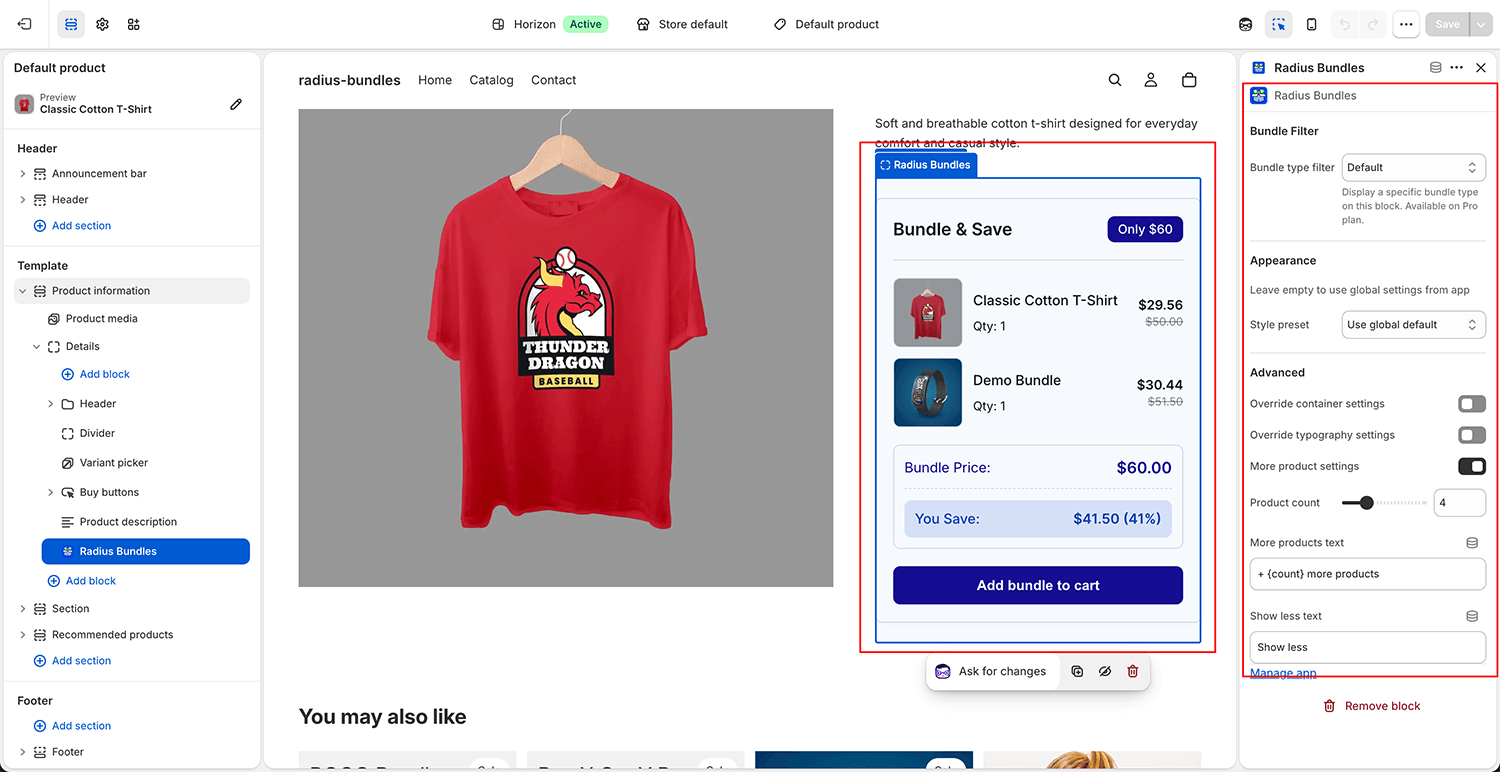
Per-Block Settings in the Theme Editor #
When you click the Widget Block in the theme editor, Shopify shows a settings panel for that block. Available settings:
| Setting | Description |
|---|---|
| Bundle type filter | Restrict the block to showing only bundles of a specific type (Fixed, BOGO, Volume, etc.). Useful if you have separate templates for different product categories and want specific bundle types on each. |
| Style preset | Apply one of the built-in visual presets (Minimal, Soft, Bold, etc.) directly from the theme editor without opening the Radius Bundles app. |
| Container and typography overrides | Adjust width, padding, font size, and other layout values for this block specifically, independently of the global settings. |
Changes made here apply only to this block instance. Global appearance settings are managed in the Radius Bundles app under Settings → Style Customizer.


